How Long Should an HVAC System Last in Northport, Alabama?
A central HVAC system rarely fails on a convenient day. In Northport, Alabama, hot, humid Gulf Coast summers create long cooling run times for an air conditioner, while occasional winter cold snaps test heating equipment during the heating and cooling seasons.
A whole-system estimate is broad because service life expectancy varies substantially by equipment type. Cooling equipment often lasts about 10 to 20 years, but each system’s HVAC system lifespan depends on proper sizing, installation, airflow, humidity control, and routine care.
Key Takeaways
- Central air conditioners in Northport commonly last about 12 to 18 years, while gas furnaces may last 15 to 25 years, depending on use, installation, and maintenance.
- Northport’s heat, humidity, pollen, rain, and debris can increase equipment strain, especially when airflow, sizing, ductwork, or coil clearance is poor.
- Age alone does not determine whether to repair or replace an HVAC system; repair history, comfort, humidity control, refrigerant type, energy costs, and safety concerns also matter.
- Regular filter changes, seasonal tune-ups, coil and drain care, and clear outdoor-unit airflow can help protect useful service life.
- Replacement estimates should include installation, efficiency, duct and electrical work, warranties, permits, and removal rather than comparing equipment prices alone.
HVAC System Lifespan Expectations in Northport Homes
A complete HVAC system doesn’t age as one unit, so HVAC system lifespan varies by component. The outdoor condenser, indoor coil, blower, and ductwork each have different wear patterns, so the table shows typical service life expectancy rather than guarantees.
| Equipment | Typical Service Life | What Shortens Its Life |
|---|---|---|
| Central air conditioner | 12 to 18 years | Long summer run times, dirty coils, poor airflow |
| Air-source heat pump | 10 to 15 years | Year-round operation, poor airflow, deferred service |
| Gas furnace | 15 to 25 years | Overheating, combustion issues, damaged heat exchanger |
| Ductless mini-splits | 12 to 20 years | Dirty filters, clogged drains, skipped cleaning |
Cooling equipment works hard in West Alabama
Northport and Tuscaloosa cooling systems often run for long stretches between late spring and early fall. Humidity adds another load because the system must remove moisture as well as heat.
A well-maintained cooling system can reach the upper end of its expected range. However, frozen coils, a recurring refrigerant leak, and high electrical strain can shorten its life by years.
Gas heating equipment often outlasts cooling systems
Gas heating equipment usually sees fewer operating hours than cooling equipment in our area. That lighter workload can help it last 15 to 25 years.
Still, a furnace should never be judged by age alone. Repeated overheating, a cracked or damaged heat exchanger, or combustion trouble warrants prompt professional evaluation. These conditions may create safety concerns, including carbon monoxide risks, before the equipment reaches its expected service life.
Why Northport Climate and Installation Matter
Northport’s high heat, summer humidity, heavy rain exposure, pollen, pine straw, and leaves all challenge HVAC equipment. Mulch and debris can restrict the outdoor unit, while poor coil clearance and attic heat can make it run longer than it should. These conditions increase strain and can shorten the equipment’s useful life.

Correct sizing protects the equipment
An oversized system cools quickly but may shut off before removing enough humidity. An undersized system can run for hours without catching up. Both add wear, leave rooms uncomfortable, and show why square footage is only a starting point.
Proper installation quality covers refrigerant charging, electrical connections, condensate drainage, airflow checks, and final commissioning. Poor ductwork design can create restricted airflow in a hot attic, limiting energy efficiency. A new high-efficiency unit cannot overcome crushed flex duct, undersized returns, or leaky attic ducts.
A replacement system should be matched to the home and its airflow, not selected by square footage alone.
When we inspect heating and cooling equipment, we look beyond the cabinet. Static pressure, return airflow, coil condition, and duct connections often explain why a system has struggled.
Refrigerant age can change the repair decision
A system that uses R-22 deserves a closer replacement conversation after compressor failure or another major repair. The EPA’s homeowner guidance on R-22 explains that new production and import of this refrigerant ended in 2020.
R-22 can still be recovered and reclaimed, but availability and repair costs can complicate a major repair. A technician should explain those costs clearly before you approve work.
Signs an Aging HVAC System Needs More Than a Repair
One service call does not mean replacement is necessary. Capacitors, contactors, drain clogs, and blower parts can fail on systems that still have useful years left.
Repair is often practical when the system is younger, the problem is isolated, and comfort remains consistent. Replacement deserves more consideration when breakdowns recur, humidity stays high, or a major safety or sealed-system component fails.
Common signs that help Northport homeowners decide whether to repair or replace an air conditioner include:
- Your home has warm rooms, weak airflow, inconsistent temperatures, or indoor humidity that never seems to drop.
- Energy bills rise even though your thermostat habits have not changed.
- The system makes grinding, screeching, buzzing, or repeated loud banging sounds.
- You need AC repair in Northport, AL more than once during a cooling season.
- The unit uses obsolete refrigerant, has a refrigerant leak, or has a major compressor, coil, or heat exchanger problem.
A serious furnace repair involving a heat exchanger can favor replacement, especially when safety concerns or extensive labor are involved.
For a broader look at symptoms that should not wait, review these AC repair warning signs.

Use the $5,000 rule as a conversation starter
The $5,000 rule is a rough conversation starter, not a strict formula. Multiply the repair estimate by the system’s age; when the total exceeds $5,000, compare it with the full installed replacement cost.
It is only a rule of thumb. A $700 repair on a 12-year-old unit may make sense. Repeated repairs, poor comfort, outdated refrigerant, or rising utility costs may support replacement sooner. Variable speed systems may improve comfort and humidity control, but correct sizing and ductwork still matter. A smart thermostat may be a useful replacement accessory, but it can’t correct poor sizing or duct problems.
Compare complete estimates, not just equipment prices
A fair replacement estimate identifies the equipment model, efficiency level, labor coverage, permits, electrical work, thermostat changes, duct repairs, and old-unit removal. A complete estimate or safety evaluation should also address any heat exchanger concerns.
Northport HVAC offers a one-year labor warranty on new installations; a manufacturer warranty generally covers eligible parts, while labor coverage comes from the installer.
The U.S. Department of Energy uses a 15-year average life when estimating air-source heat pump lifetime energy costs. That makes operating costs and energy efficiency worth considering when comparing an aging unit with a new model.
Maintenance Habits That Add Useful Years
Regular maintenance won’t make equipment last forever. Preventative maintenance helps control moisture and protect airflow while catching drain, electrical, coil, and safety problems before peak summer demand.
Start with filters and airflow
Check standard 1-inch air filters monthly, and replace them every 30 to 60 days when they look loaded with dust. Homes with pets, allergies, renovation dust, or heavy summer use may need more frequent changes. Clean filtration supports indoor air quality, but basic filters don’t replace dedicated humidity control.
Our guide on changing HVAC filters in Alabama explains why restricted airflow or dirt can freeze evaporator coils and reduce dehumidification. Keep return grilles clear, leave most supply vents open, and remove leaves or mulch from around the exterior equipment.
Schedule seasonal service before extreme weather
Schedule professional tune-ups before Northport’s heating and cooling seasons. Spring service should include coil cleaning, drain checks, electrical testing, and refrigerant-performance checks. Ductless mini-splits also need cleaning for their filters, drain paths, and indoor heads. Fall service should cover furnace ignition, venting, airflow, safety controls, and a professional heat exchanger inspection.
Our local HVAC technicians service common heating and cooling systems, including ductless mini-splits, throughout Northport and nearby communities. When an air conditioner quits, emergency service is available, but planned maintenance is usually cheaper and less stressful.
Frequently Asked Questions
How long does an HVAC system last in Northport, Alabama?
A central air conditioner typically lasts about 12 to 18 years in Northport, while a gas furnace may last 15 to 25 years. Actual service life depends on sizing, installation quality, airflow, humidity, operating hours, and maintenance.
Should I repair or replace my aging HVAC system?
Repair may make sense when the system is younger, the problem is isolated, and comfort remains consistent. Replacement deserves more consideration when repairs recur, energy costs rise, humidity stays high, or a major compressor, coil, heat exchanger, or sealed-system component fails.
Does regular HVAC maintenance really extend equipment life?
Preventative maintenance cannot make equipment last forever, but it can help protect airflow, control moisture, and identify electrical, drain, coil, and safety problems early. Replacing filters regularly and scheduling professional service before heating and cooling seasons are especially useful in Northport’s climate.
What is the $5,000 rule for HVAC replacement?
The $5,000 rule compares the repair estimate multiplied by the system’s age with a $5,000 threshold. It is only a conversation starter, so homeowners should also consider comfort, repair history, refrigerant availability, efficiency, and the complete installed replacement cost.
Does an R-22 system need to be replaced?
Not necessarily, but R-22 availability and repair costs can make major repairs less practical. After a compressor failure, refrigerant leak, or other expensive repair, compare the repair cost and expected reliability with replacement options.
A Longer HVAC Life Starts With Clear Decisions
Regular maintenance and sound installation can extend useful operation in Northport, while preventative maintenance helps protect reliable comfort over time. Age matters, but repair history, airflow, refrigerant, and safety matter more.
When the system starts costing more to keep than it gives back in comfort, rising energy bills can support replacement. A serious furnace heat exchanger safety issue can outweigh age-based repair assumptions.
A properly selected heat pump may also be worth comparing for Northport’s mixed heating and cooling needs. Compare the replacement cost with continued repairs, then decide whether to repair or replace based on humidity control, safety, repair history, and actual comfort.
What a TXV Does and Why It Affects Your Cooling
When an AC runs for hours but leaves the house warm, the problem may be hidden inside the indoor unit. A thermostatic expansion valve (TXV) regulates refrigerant flow into the evaporator. If that flow is wrong, cooling weakens, ice forms, and improper vapor return can strain the compressor.
This small metering device doesn’t create cold air on its own. It meters liquid refrigerant as part of the refrigeration cycle, helping maintain the controlled flow and vapor return the system needs.
Key Takeaways
- A thermostatic expansion valve (TXV) meters liquid refrigerant into the evaporator and helps maintain proper superheat.
- A restricted, stuck, or overfeeding TXV can cause weak cooling, ice, unstable operation, or liquid refrigerant return to the compressor.
- Low airflow, low refrigerant charge, dirty coils, blower problems, and a blocked filter drier can mimic a failed TXV.
- Proper diagnosis requires checking airflow, coil condition, refrigerant charge, pressure, temperature, superheat, and sensing bulb installation.
- Homeowners should handle basic maintenance only and call a licensed HVAC technician for refrigerant testing, valve adjustment, or replacement.
How a Thermostatic Expansion Valve Controls Cooling
High-pressure liquid refrigerant leaves the condenser and reaches a TXV near the evaporator coil. As refrigerant passes through the valve, it experiences a pressure drop, then boils in the low-pressure evaporator and absorbs heat from indoor air.
The valve adjusts its opening as cooling demand changes. Parker explains that the valve regulates flow at the evaporator outlet, helping keep the coil fed without flooding the system. See Parker’s TXV operating description for a manufacturer overview.

The sensing bulb monitors refrigerant temperature
A sensing bulb is clamped to the suction line leaving the coil. Its bulb charge responds to line temperature and creates force on the valve diaphragm.
When the line warms, pressure in the sensing bulb rises and pushes the valve open. More refrigerant flow feeds the coil. When the line becomes too cold, the valve closes down.
The TXV’s goal is to keep the coil fed while avoiding liquid return.
Superheat keeps liquid out of the compressor
Superheat is vapor temperature above its boiling point after it has fully boiled in the evaporator. It helps keep liquid refrigerant out of the suction line.
Low readings can allow liquid to return, while excessive readings may indicate a starved coil and reduced cooling capacity. Copeland’s refrigeration troubleshooting guidance explains why this measurement matters on the suction side. Measuring superheat or related system conditions requires professional instruments, so a technician should handle testing and valve decisions.
Why a TXV Problem Can Make an AC Feel Weak
A stuck or restricted thermal expansion valve can limit flow through the coil. The system may cool poorly even while the outdoor unit continues to run. A restricted TXV can starve the evaporator, causing weak heat absorption, while overfeeding can send too much liquid refrigerant toward the compressor.
A valve can also experience hunting, repeatedly opening and closing as it seeks the correct flow. Minor hunting is normal as loads change. Persistent hunting can destabilize temperatures and pressures, making professional troubleshooting necessary.
Low charge can look like a bad valve
A refrigerant leak reduces the liquid available at the valve inlet. As a result, the coil may starve and absorb less heat, even if the valve works properly.
That is why we don’t call the valve failed from one pressure reading. Maintenance records and measured system conditions help establish a baseline. Airflow restriction, dirty evaporator surfaces, weak blower performance, a blocked filter drier, or low charge can mimic a restricted valve.
Ice on the refrigerant line does not prove the valve failed. Low airflow and low charge can freeze a coil too.
Signs That Call for Professional TXV Testing
Homeowners can replace a dirty filter, keep return grilles clear, and make sure supply registers remain open. These steps support basic maintenance, but advanced troubleshooting requires trained equipment and a measured process.
Call a licensed HVAC technician for refrigerant diagnostics, pressure testing, or valve replacement. Homeowners shouldn’t connect gauges, recover refrigerant, adjust superheat, or replace the valve themselves.
Call for AC service if you notice any of the following, which can have several causes:
- The system runs continuously but delivers little cool air, possibly because of airflow, charge, or control faults.
- Ice forms on the indoor coil or copper line, which can indicate restricted airflow or another system problem.
- Airflow drops even after you replace the filter, suggesting a blower or coil issue.
- The indoor unit leaks water after ice melts, often following a frozen coil.
- Cooling swings between too cold and too warm, and a TXV issue is only one possible cause.
- The compressor makes unusual noises or the system short-cycles, both of which warrant prompt service.

Photo by José Andrés Pacheco Cortes
What technicians check before replacing a TXV
Our local team begins with airflow and outdoor-side condenser operation. A blocked return, matted coil, failing blower, or dirty condenser can change system readings.
We inspect the evaporator coil, measure evaporator temperature, and assess whether the evaporator transfers heat properly. Technicians also verify sensing bulb placement, insulation, and contact with the suction line.
Next, we inspect the refrigerant circuit for leaks, evaluate the charge, and record operating conditions. At the valve inlet, liquid refrigerant should enter before metering.
We compare pressure, temperature, and superheat readings to determine whether the coil is starved or overfed. We also assess compressor operation because liquid returning to it can cause damage.
This troubleshooting sequence helps avoid condemning a TXV from one gauge reading. We compare the results with manufacturer specifications and actual load conditions, including condenser performance. Danfoss explains that a thermostatic expansion valve is designed to regulate flow across varying loads, so testing must reflect actual operating conditions rather than one pressure reading. Review how Danfoss describes TXV operation for more detail.
For AC repair Northport AL homeowners can trust, Northport HVAC checks the root cause before recommending valve replacement or other service.
Internal and External Equalization Explained
Most residential systems use a TXV matched to the equipment, refrigerant, and coil design. An internally equalized valve senses pressure at the valve outlet.
An externally equalized valve uses a separate line to sense pressure at the evaporator outlet, farther from the valve. That separate reference can improve control when a distributor or long coil creates greater pressure loss.
An internally equalized valve uses its outlet pressure as the reference. This approach often suits applications with minimal distributor or coil pressure loss. An internally equalized design may be less accurate when those losses are significant.
Mechanical TXVs and electronic valves
A mechanical TXV uses a sensing bulb, diaphragm, spring, and needle valve assembly to regulate flow. Bulb pressure and spring force move the diaphragm, adjusting the metering path to control refrigerant flow. It needs no control board, and proper selection, installation, and testing support reliable operation.
An electronic expansion valve, or EEV, uses sensors and a controller to make finer changes than a mechanical valve. An EEV can respond to changing loads, while a mechanical valve relies on bulb pressure and spring settings. Some advanced air conditioning systems use an electronic expansion valve.
Certain heat pump designs use an EEV when reversing operation changes flow direction. Another heat pump may use a different metering arrangement, based on its design and operating mode.
Maintenance records should list component specifications and service history. Professional testing can confirm whether an electronic expansion valve (EEV), an internally equalized valve, or another component matches the equipment. Valve selection, charging, and electrical control diagnosis require a qualified technician.
For Tuscaloosa air conditioning problems, our same-day AC service in Tuscaloosa can identify whether the issue involves the valve, airflow, or another component.
Protecting Cooling Performance Through Maintenance
Routine heating and cooling maintenance helps rule out airflow and heat-transfer problems before a technician diagnoses a failing TXV. We check filters, indoor coil condition, drain operation, electrical connections, and airflow before Alabama heat puts the system under its heaviest load. Restricted airflow reduces heat transfer across the evaporator and can distort refrigerant readings.
Replace dirty filters, clear return grilles, and leave registers open; restricted ducts can raise pressure and reduce airflow across the indoor coil. Keep the outdoor unit clear of debris so air can move around the condenser. Routine service doesn’t replace refrigerant leak testing; a licensed professional must perform refrigerant-circuit work.
If your AC stops cooling during extreme heat, shut it down if ice, water, burning odors, or loud mechanical sounds appear. Prompt professional service can help prevent compressor or other component damage.
Frequently Asked Questions
What does a thermostatic expansion valve do?
A thermostatic expansion valve meters liquid refrigerant into the evaporator as cooling demand changes. It helps keep the coil supplied while limiting liquid refrigerant from returning to the compressor.
Can a bad TXV cause ice on an AC coil?
A restricted TXV can starve the evaporator and contribute to freezing. However, low airflow, low refrigerant charge, and dirty coils can also cause ice, so ice alone does not prove the valve failed.
How can a technician tell if a TXV is failing?
A technician checks airflow, coil condition, refrigerant charge, pressure, temperature, superheat, and sensing bulb placement. These measurements help distinguish a valve problem from other faults that produce similar symptoms.
Can homeowners replace or adjust a TXV?
TXV replacement and adjustment require refrigerant recovery, specialized instruments, and equipment-specific procedures. Homeowners should arrange service with a licensed HVAC technician rather than connecting gauges or opening the refrigerant circuit themselves.
Does every cooling problem involve the TXV?
No. Weak cooling and long run times can result from restricted airflow, dirty coils, low charge, blower problems, condenser issues, or control faults. A complete diagnosis should check these possibilities before recommending valve replacement.
A Small Valve With a Big Job
A TXV controls refrigerant flow into the evaporator, helping the system remove heat efficiently. By regulating the feed, it helps limit liquid refrigerant from reaching the compressor, though other faults can still cause damage.
Weak cooling, ice, and long run times deserve a full diagnosis, and persistent symptoms or short cycling call for licensed service. The right repair starts with airflow and refrigerant measurements, not a guess at the valve.
Thermostat Location: Comfort, Runtime, and Better Readings
A thermostat samples the air around its control, not the temperature across the whole home. A poor thermostat location can make a healthy HVAC system seem weak, wasteful, or unreliable by changing what the system responds to.
That reading shapes climate control, including when heating and cooling start and stop. If one room feels fine while the rest of the house is uncomfortable, don’t assume the equipment is failing. Poor placement can cause long runtimes, short cycling, uneven temperatures, or higher utility bills, but it doesn’t always point to an equipment problem. Start by looking at what is influencing the thermostat itself.
Key Takeaways
- Mount the thermostat on an interior wall, about five feet above the floor, in a frequently used area that represents the home’s conditioned spaces.
- Keep it away from direct sunlight, exterior walls, doors, windows, supply vents, return grilles, kitchens, fireplaces, and other heat sources or drafts.
- Uneven temperatures, long runtimes, and short cycling may come from airflow restrictions, duct leakage, sensor inaccuracy, or equipment problems—not just thermostat placement.
- Remote sensors and zoning can help multi-level homes or rooms with persistent temperature differences when they are properly designed and configured.
- Before replacing or relocating a thermostat, verify temperature readings, wiring, equipment compatibility, airflow, and overall system performance.
How Placement Changes HVAC Runtime
Your thermostat doesn’t measure the whole house. It measures the air immediately around it, and the HVAC system reacts to that local sample.
A thermostat exposed to direct sunlight may read warmer than the room. During a Northport summer, that false heat can keep the AC running after the rest of the house feels comfortable. Near a drafty exterior door, it may sense cooler air in winter and call for more heat than you need.
The system can only respond to the temperature information it receives.
Long runtimes, short cycling, and uneven comfort don’t always mean your equipment is undersized. A local reading may miss the home’s average temperature, while poor placement, nearby supply vents, poor return airflow, duct leakage, or an inaccurate sensor can contribute to higher energy bills.
A thermostat that reads a few degrees warmer or cooler than the living space can change comfort in every room, even when the equipment is operating normally.
Before you change the setpoint again, look for recurring temperature swings. Does the system run hardest during afternoon sunlight? Does it shut off soon after starting? Does the hallway feel different from the rooms where people spend time? Those details help separate a placement issue from an equipment problem.
Where to Mount a Thermostat for Accurate Readings
For most homes, the best choice is a central location on an interior wall that represents the conditioned areas where occupants spend time. It should sense ordinary household air, not heat from an appliance or a blast of conditioned air.

Choose a suitable wall near daily activity
A central hallway can work well if it connects the living room, bedrooms, and other occupied areas. A frequently used room may be a better choice than a hallway closed off from the main living space, since it may not represent the home’s average temperature.
We usually look for a wall near the center of the conditioned area, away from exterior walls. The location should have normal air circulation, rather than stagnant air or forced airflow from a return grille or supply register.
Common manufacturer placement guidance puts the thermostat on an interior wall, around five feet above the floor. This thermostat placement guide also recommends an interior wall and a mounting height near 60 inches.
Mount it at a representative height
Warm air rises, while cooler air settles near the floor. A thermostat mounted too high can read warmer during heating season. One mounted low can respond too quickly to cooler air near the floor.
About five feet from the finished floor is a practical middle point for most households. It is also high enough to avoid bumps from furniture and low enough for convenient use.
If a thermostat is already mounted at a reasonable height, don’t move it for a one-degree difference alone. First compare it with a reliable thermometer placed nearby for at least 15 minutes. Review the temperature readings before relocating the control. A persistent difference or comfort pattern may warrant evaluation.
Thermostat Placements That Create Bad Readings
Some wall spaces look convenient during installation but create misleading readings every day. Heat from direct sunlight or exterior walls can enter the thermostat enclosure, causing premature or delayed calls for heating or cooling. The thermostat may be functional while its location sends the system the wrong signal.

Keep it away from sun, drafts, and vents
Solar heat can warm the thermostat housing, even if the room air remains comfortable. A west-facing wall near a large window is a frequent problem in West Alabama homes.
Likewise, avoid placing it close to:
- Exterior doors, open windows, and drafty entryways.
- Supply registers that blow heated or cooled air directly across the sensor.
- Return grilles or unusual return-air streams that alter air circulation around the thermostat.
- Kitchens and laundry rooms, plus fireplaces, lamps, electronics, and other heat-generating appliances.
- Exterior walls that warm or cool faster than interior walls.
A smart thermostat placement overview outlines why solar gain and nearby heat sources can distort readings, increase runtime, and contribute to higher energy bills without improving comfort.
Don’t let one room control the whole house poorly
A thermostat near the kitchen can shut cooling off too soon when dinner is cooking. A thermostat in a rarely used guest room can make the living area too warm or too cool for everyone else.
Open floor plans need extra care. The thermostat should not sit beside a sliding glass door or under a ceiling fan that creates a constant draft. Avoid locations where afternoon solar exposure brings direct sunlight onto the sensor.
Sometimes the “wrong” thermostat location was the only available spot when the house was built. Relocation may be appropriate when readings stay persistently biased. It may require new low-voltage wiring, although some wireless smart thermostat systems offer more flexibility. A professional should verify the wiring, equipment compatibility, and whether the new location represents typical home conditions before moving it.
Room Layout, Zoning, and Multi-Level Homes
A single thermostat has limits. It cannot fully correct a two-story home with strong temperature swings, a finished bonus room, or a sunroom with extensive glass.
Address airflow before chasing settings
If the upstairs stays warm while the downstairs feels cold, the thermostat may not be the only issue. Hot air naturally rises, but return-air capacity, attic ductwork, insulation, and system sizing also shape the result.
Start with safe checks:
- Replace a dirty filter with the correct size and airflow direction.
- Keep supply registers open throughout the home.
- Move furniture, curtains, and storage away from return grilles.
- Check accessible ductwork for loose connections, crushed flex duct, missing insulation, or peeling tape.
Closing vents downstairs to force air upstairs can restrict air circulation and raise duct pressure. It can also reduce total airflow and make the blower work harder.
Use zoning or remote sensors where they fit
A compatible smart thermostat with remote room sensors can prioritize a frequently used room during certain hours. This may be an occupied bedroom or living room. It helps when the main thermostat doesn’t reflect where your family spends time.
Zoning systems use separate thermostats and motorized dampers to control different areas. They require proper design, because adding dampers to an already restricted duct system can create airflow problems.
For a home with a persistent hot room, we look beyond thermostat settings. Remote sensors and zoning can improve control when properly configured. Measured airflow, static pressure, duct condition, insulation, and system sizing often explain more than another wall adjustment.
When the Thermostat Isn’t the Real Problem
A thermostat is often blamed because it is the most visible part of the HVAC system. Yet weak airflow, a frozen coil, a dirty filter, a damaged duct, or failing equipment can create similar symptoms.
Watch for clues beyond the display
Call for service if your system has ice on refrigerant lines, water around the indoor unit, electrical odors, breaker trips, grinding sounds, or repeated short cycles. Those signs need a diagnosis, not a new thermostat.
If the screen goes blank, check the batteries if your model uses them. You can also confirm the breaker is on and the system mode is set correctly. Don’t remove equipment panels or bypass safety controls.
For AC repair in Northport, AL, we recommend noting the temperature setting, room temperature, airflow at vents, and when the problem occurs. That information gives technicians a better starting point.
Confirm airflow and duct performance
A clogged filter can restrict airflow and cause the system to overheat or freeze. A blocked return grille can create the same strain. Meanwhile, loose attic duct connections can spill cooled air before it reaches the room that needs it.
Technicians may use static-pressure testing to find resistance in the filter, coil, returns, and ducts. A duct blaster and digital manometer can measure duct leakage under controlled pressure, often reported as CFM25.
Those tests answer different questions. A high leakage reading does not prove weak airflow at one register, and a low airflow reading does not automatically prove a duct leak. We interpret the results together before recommending repairs. If symptoms persist or safety warnings appear, arrange a professional evaluation.
Thermostat Replacement and Professional Setup
A new thermostat can improve control, but it won’t fix a blocked drain, leaking ducts, or an oversized system. Match the control to the equipment and the home’s actual comfort needs.
Pick controls that match your system
Heat pumps, multi-stage furnaces, variable-speed air handlers, and Mitsubishi mini-splits may need specific thermostat settings or controls for reliable climate control. Incorrect wiring or setup can disable auxiliary heat, cause frequent cycling, or prevent a system from reaching full capacity.
Northport HVAC works with Trane, Carrier, Rheem, Lennox, Goodman, and Mitsubishi systems. During installation, we verify thermostat response, wiring, airflow, and heating and cooling operation instead of treating the wall control as a stand-alone part.
A thermostat move makes sense when the existing sensor is persistently exposed to biased heat, drafts, or strong airflow. It also creates a good opportunity to inspect the old wire path. Damaged low-voltage wiring, loose connections, and an improperly configured smart thermostat can imitate a sensor problem.
For homeowners dealing with inconsistent comfort or rising runtime, local HVAC technicians in Northport can inspect the thermostat along with the full system.
A Different Meaning of a Vehicle Thermostat
Questions about a vehicle thermostat concern an engine cooling component, not a home HVAC control. The two parts do completely different jobs.
Finding an engine thermostat safely
In many vehicles, the engine thermostat sits inside a thermostat housing where the upper radiator hose connects to the engine. Proper regulation helps the engine reach operating temperature and may support fuel efficiency while limiting unnecessary engine wear.
Follow the upper radiator hose from the radiator toward the engine, then inspect the thermostat housing for bolts or clips. Access may require disconnecting the upper radiator hose after the engine is fully cool.
Some engines place the thermostat near the water pump or at a different coolant outlet. In those layouts, the thermostat housing may sit behind other components. Always use the owner’s manual or a vehicle-specific repair manual before taking anything apart.
The cooling system may remain pressurized after driving. Follow basic safety precautions: never open a radiator cap or disconnect a hose on a hot engine. Wait until the engine is fully cool, then drain the cooling system and contain and dispose of engine coolant safely because it is toxic.
Replacement needs more than a new part
A typical service may require a drain pan, hand tools, a gasket or O-ring, fresh manufacturer-approved coolant, and a way to bleed trapped air from the cooling system. Exact requirements vary by vehicle, especially when access involves the thermostat housing cover or the water pump.
Before opening the thermostat housing, clean its mating surfaces and inspect the gasket or O-ring for damage. Many engines use a wax-pellet heat sensing element, not a universal “copper heat sensor.” Install the thermostat as shown in the service manual, then seat it securely in the thermostat housing. Reconnect the upper radiator hose during reassembly, and position any jiggle valve or air-bleed feature as directed.
After refilling, inspect the cooling system for leaks and watch the temperature gauge as the engine warms. If your home has cooling trouble, Tuscaloosa air conditioning service is the relevant solution. If your vehicle is overheating, use an automotive repair professional instead, since diagnosis may involve the water pump.
Frequently Asked Questions
Where is the best place to install a thermostat?
The best location is usually an interior wall about five feet above the floor, in a central and frequently used area. Choose a spot with normal air circulation that represents the rooms where occupants spend time.
What locations should be avoided for a thermostat?
Avoid direct sunlight, exterior walls, drafty doors or windows, supply registers, return grilles, kitchens, laundry rooms, fireplaces, and heat-producing electronics. These conditions can make the thermostat read warmer or cooler than the surrounding living space.
Can thermostat location cause long runtimes or short cycling?
Yes. A thermostat exposed to biased heat, drafts, or forced airflow may call for heating or cooling at the wrong times. However, airflow restrictions, duct problems, sensor issues, and equipment faults can create similar symptoms and should also be evaluated.
Should I move my thermostat if one room is too hot or cold?
Relocating the thermostat may help when its current reading is persistently affected by sunlight, drafts, or nearby heat sources. If the problem continues, check filters, registers, returns, ducts, insulation, and system performance before moving the control.
Do smart thermostats or remote sensors help with uneven temperatures?
A compatible smart thermostat with remote sensors can prioritize a frequently occupied room during selected hours. Zoning can provide more control in multi-level homes, but it requires proper duct design and configuration to avoid airflow problems.
Comfort Starts With an Honest Temperature Reading
A reliable thermostat location gives your system a fair chance to maintain comfort. Place it on an interior wall in a frequently used room, about five feet high, away from solar heat, vents, and drafts. Avoid exterior walls, which can produce less representative conditions.
When comfort problems continue after placement checks, airflow, duct condition, sensor accuracy, or equipment performance may be responsible. Accurate temperature readings and measured diagnosis can reveal the cause, prevent wasted runtime, and help avoid higher energy bills.
Seek professional evaluation for persistent comfort differences, abnormal runtime, short cycling, or safety symptoms. Emergency AC repair may be appropriate for an active cooling failure during extreme heat, but not every thermostat concern requires emergency service.
Mini-Split Maintenance Checklist for Alabama Homes
A ductless mini split can cool a room fast, but a dirty indoor head can spread stale odors, leak water, and waste power. Regular mini split maintenance can support comfort, energy efficiency, lower energy bills, and indoor air quality when performed according to the model manual.
For homeowners, landlords, and property managers, this checklist covers safe observations and basic cleaning only. Clean filters, keep airflow paths open around the indoor head and outdoor equipment, and watch for changes after severe weather. Alabama humidity, pollen, and long periods of heavy use during the cooling season affect inspection needs. Coastal salt air, storm debris, or flooding may require closer inspection.
Use this checklist to keep each indoor head and outdoor equipment ready for long West Alabama cooling periods and help extend the system’s lifespan.
Why mini split maintenance matters in Alabama
Mini-splits move air through compact indoor units, so Alabama’s humidity and pollen can leave buildup on air filters, the evaporator coil, drain pan, and blower wheel. Cooking residue, pets, smoking, construction dust, and coastal air can add more. During humid weather, dust may hold moisture and create conditions for mildew, but visible buildup alone doesn’t confirm a problem.
Restricted air movement makes the system run longer and may raise energy bills. If a room feels clammy, inspect the filters and visible air paths before changing settings. That symptom suggests a comfort issue, not a confirmed cause.
A clean system removes heat and moisture more easily. Routine maintenance also places less strain on fan motors and compressors. FilterBuy’s mini-split maintenance guide recommends cleaning reusable filters every two to four weeks. Use that interval as a reference point, not a universal rule, for heavy-use homes in Northport and Tuscaloosa.
A mini-split can still blow cool air with a dirty filter, but reduced air movement, longer run times, or a musty smell may have causes beyond the filter.
A practical mini split maintenance schedule
The right schedule for a ductless mini split starts with the manufacturer’s instructions. Then adjust routine maintenance for pollen, pets, cooking, smoking, nearby construction, coastal salt exposure, rental turnover, and heavy use. A guest-room head may need less attention than the unit cooling a busy living room all summer.
These are practical starting points, not guarantees for every Alabama home. Adjust them for local conditions, usage, and the equipment manual. This calendar keeps care manageable without opening sealed equipment or handling electrical components.
| Task | Timing to consider | What to check |
|---|---|---|
| Clean air filters | Follow the manual; every 2 to 4 weeks is an example for heavy use | Dust, pet hair, restricted airflow, and whether reusable filters need cleaning |
| Wipe the indoor cabinet and louvers | Monthly as a starting point, or more often in dusty conditions | Surface dust and visible moisture |
| Inspect outdoor unit clearance | Monthly as a starting point, and after storms | Outdoor condenser: leaves, grass clippings, vines, mulch, and coastal debris |
| Check drainage and odors | Every 1 to 3 months as an example, plus whenever symptoms appear | Drips, unusual odors, or slow drainage |
| Schedule professional maintenance | Follow the manual and usage; consider a pre-peak visit for heavy use | An HVAC technician can inspect drainage, wiring, coils, refrigerant performance, and controls |
After high winds, lightning, wind-driven rain, or flooding, visually check for debris or damage without opening panels. Arrange service if a unit has shifted, flooded, or is visibly damaged.
For rentals, we recommend putting filter cleaning in the lease or maintenance instructions. That reminder supports routine care but doesn’t replace professional service. A reminder at move-in, turnover, or monthly inspections can help avoid a preventable call after tenants report weak cooling.
Set reminders for every indoor head
A multi-zone system needs attention at each wall-mounted unit. One clean bedroom head won’t correct a clogged filter in the den. Label reminders by room in your calendar, especially when several tenants or family members control different zones.
High-use homes may need filter cleaning more often during pollen season or when pets shed. Our mini-split filter cleaning tips can help you build a schedule around your home’s actual conditions.
Plan service before peak weather
We suggest booking a spring tune-up before the cooling season when manufacturer guidance and system use support it. A second visit before the heating season is an option for year-round systems and may help protect the system’s lifespan.
During a service visit, a qualified professional can inspect areas you can’t safely reach, verify operation, and test drainage. Mitsubishi mini-splits, as well as Trane, Carrier, Rheem, Lennox, and Goodman equipment, still need service that follows the model’s instructions.
Safe DIY maintenance for the indoor unit
Turn the system off with the remote, but don’t assume that makes a ductless mini split safe to open. Follow the model manual for shutdown and power isolation, including the disconnect or circuit breaker. If you can’t safely identify either one, stop and call a professional. Never open electrical compartments, touch electrical connections, or work near wet components.

Wash washable filters the right way
Lift out the air filters carefully, following the manual’s removal instructions. Use a vacuum with a soft brush attachment for loose dust. Then rinse them with lukewarm water. Mild dish soap is fine for greasy buildup, but don’t use bleach, harsh cleaners, or abrasive brushes.
Allow reusable filters to air-dry fully before reinstalling them, as the manual directs. Clean, dry filters help maintain normal airflow, while damp filters can encourage odor and mold growth inside the head.
Keep these supplies nearby:
- A microfiber cloth for the cabinet and louvers.
- A vacuum with a soft brush attachment for dry dust.
- Lukewarm water, mild soap, and a coil cleaner approved by the manufacturer, if the manual permits it.
- A flashlight to inspect the drain area and nearby surfaces.
- The unit’s manual, because filter removal, drying, reinstallation, and cleaning guidance vary by model.
Clean only the accessible coil surfaces
After removing the filters, use the flashlight to inspect the visible surface of the evaporator coil behind them. A light dust layer may come off with a soft brush or a coil cleaner approved by the manufacturer.
However, don’t spray cleaner toward the circuit board or electronics. Never scrape fins with a screwdriver or metal brush. Bent fins and damaged wiring can turn a simple cleaning job into a repair.
The blower wheel sits deeper inside the head and may collect dark residue that causes a musty smell. If the smell persists, have a technician clean the blower wheel; disassembly and electronics protection are usually required.
Keep the outdoor condenser clear and clean
Your outdoor unit needs room to move heat into the outside air. In Alabama, grass clippings, pine straw, pollen, leaves, mulch, coastal salt deposits, and storm-blown debris can restrict the coil or damage components.

Maintain open space around the unit
Follow the manufacturer’s recommended clearance around the condenser. Required spacing varies by model, so check the installation manual before trimming nearby plants.
Keep grass, shrubs, leaf piles, pine straw, pollen, mulch, and storm debris away from the base. During sustained Alabama demand in the cooling season, clear space supports airflow and energy efficiency.
Don’t stack furniture, pool toys, trash bins, or lawn equipment beside it. These obstructions recirculate hot air and make the compressor work harder.
After mowing or severe weather, inspect from a safe position. Blow grass away from the coil, not toward it. Don’t operate the system if it’s flooded, visibly damaged, or surrounded by unsafe electrical conditions.
Rinse gently, avoid high-pressure cleaning
With power safely off, gently rinse loose debris from the condenser coils with a garden hose, only if the manual permits. Aim from inside outward when possible, without removing panels or directing water toward electrical components.
Never use high-pressure cleaning. It can flatten thin aluminum fins and restrict heat transfer. Use a manufacturer-approved coil cleaner only when the manual permits it.
Leave oily, matted, salt-encrusted, or deeply embedded debris to a professional. If the outdoor condenser is flooded, damaged, or still blocked, schedule service instead of opening the cabinet.
Alabama seasonal HVAC preparation guidance also stresses regular filter attention during high-use months, when systems have little recovery time between hot days.
Stop musty odors and indoor dripping early
A musty smell often points to moisture and organic buildup in the indoor head or condensate path. Alabama’s humidity can make these odors more noticeable. Cleaning the filter may improve the smell, but it won’t remove debris lodged on the coil or drain pan.
Water dripping from the indoor unit often means the condensate drain line is restricted, disconnected, or unable to drain correctly. A dirty coil can contribute by restricting cooling and causing ice buildup, followed by excess water when the ice melts.
Check the visible drain path without forcing it
Look for water under the indoor head, wall staining, or moisture near the condensate drain line’s outdoor termination. Also check that the discharge point isn’t buried in mulch or blocked by debris.
Don’t insert wire, force compressed air, or add chemical drain products into the line without a manufacturer-approved procedure. These methods can damage tubing or push a clog back toward the indoor unit. Turn the system off if it leaks, protect flooring and furnishings, and arrange a diagnosis before water leaks cause damage.
A qualified professional should diagnose recurring drainage, slope, pan, coil, or blower problems. They can clean components, flush the drain safely, and verify its slope.
Persistent odors need more than fragrance
Don’t mask a recurring musty smell with room spray. If the odor returns quickly after filter cleaning, the indoor coil or blower wheel may need deeper cleaning. Recurring odors can affect indoor air quality.
A qualified professional can clean those components, flush the drain safely, and check whether the system is draining correctly.
For landlords, document recurring odor and leak reports by room. That record helps identify whether one zone has a drainage issue or whether several heads need scheduled deep cleaning.
Signs that call for professional mini-split service
DIY care is useful, but it has limits. A ductless mini split contains refrigerant circuits, capacitors, controls, and energized wiring. Routine homeowner cleaning doesn’t authorize work on these parts. Mini split maintenance should shift to service diagnosis when coil access or fan cleaning requires trained hands.
Call for service when you notice any of these problems:
- Ice buildup appears on the indoor coil, refrigerant line, or outside equipment.
- The system has water leaks indoors or repeatedly trips a drain safety switch.
- Cooling stays weak after you clean the filters and clear nearby debris, especially when airflow is reduced.
- A new grinding, buzzing, screeching, or loud rattling sound starts.
- The unit short-cycles, runs constantly, or displays a recurring error code.
- You smell burning plastic, see exposed wiring or damaged electrical connections, or have repeated circuit breaker trips.
- A persistent musty smell returns after cleaning or drying the unit.
- Lightning, wind-driven rain, storm debris, salt corrosion, or flooding visibly damages the equipment.
In Alabama, don’t restart flooded or visibly damaged equipment. Follow the manufacturer’s emergency instructions and arrange a professional diagnosis.
Turn the system off for burning odors, exposed wiring, repeated electrical trips, substantial leaks, ice, or abnormal noises, but only if it can be done safely. Continuing to run it can worsen an existing fault or water damage.
Our AC repair warning signs explain why weak cooling, noise, and moisture deserve timely attention. For AC repair in Northport, AL, Northport HVAC provides clear diagnoses before repairs begin. An HVAC technician from our team services ductless systems throughout Northport, Tuscaloosa, Coker, Samantha, and nearby communities.
What professional maintenance should include
A quality appointment goes beyond rinsing filters. Professional maintenance should follow the model manual and operating hours. It should also account for pollen and pet exposure, coastal salt air, and storm events. Timing depends on whether the system provides heating as well as cooling.
For a ductless mini split, mini split maintenance may include cleaning the blower wheel and coils where needed. It may also include inspecting the condensate drain line and testing electrical connections after de-energizing the system. The technician can clean the outdoor unit and check system operation and airflow.
Cleaning products, including coil cleaner, must be compatible with the manufacturer. Accessing internal blower or coil components is professional work. Refrigerant levels require careful interpretation because a sealed system doesn’t normally consume refrigerant. A low reading calls for leak diagnosis, not an automatic top-off.
After severe weather, a technician should inspect the condenser coils and outdoor condenser for debris, corrosion, or damage. Homeowners shouldn’t open panels to perform that inspection.
Ask an HVAC technician for an estimate that explains the work, parts, labor, and recommendations. Transparent pricing matters, especially when you manage a rental property or several zones. Routine maintenance or a tune-up may support energy efficiency and equipment lifespan. Neither guarantees specific savings or a fixed service life. Systems that run through the heating season may need a different schedule than cooling-only equipment.
Northport HVAC is locally owned, licensed, insured, and staffed by NATE-certified technicians. We offer routine service and 24/7 emergency AC repair for urgent cooling issues, along with help for ductless heating concerns when temperatures drop.
Frequently Asked Questions
How often should I clean my mini-split filters?
Follow the manufacturer’s instructions for your model. Every two to four weeks is a practical starting point for heavy-use Alabama homes, especially with pets, pollen, or construction dust.
Can I clean the indoor coil and blower wheel myself?
You can inspect and gently clean accessible coil surfaces when the manual permits it. Leave blower wheel cleaning and deeper disassembly to a qualified professional to protect the electronics and prevent damage.
Why is my mini-split leaking water indoors?
An indoor leak may result from a restricted condensate drain, a drainage problem, or ice that has melted after restricted airflow. Turn the system off if it continues to leak and arrange a professional diagnosis before water damages the wall or flooring.
When should I call an HVAC technician for mini-split maintenance?
Call for service when weak cooling continues after filter cleaning, or when you notice ice, recurring odors, unusual noises, electrical problems, or error codes. Professional service is also recommended after flooding, lightning, visible storm damage, or heavy debris around the outdoor unit.
Final maintenance takeaway
Basic mini split maintenance starts with clean filters and clear airflow around the exterior equipment. Alabama humidity, pollen, sustained cooling demand, coastal salt air, and storm or flooding risks can affect comfort and energy bills.
Follow your model manual for safe DIY tasks, and don’t assume every home needs the same maintenance interval. A musty smell, water, ice, weak cooling, or unusual noise calls for professional help, especially after a storm or flood.
Carbon Monoxide Detector Placement Near a Gas Furnace
A gas heating system can operate safely for years, but blocked venting or combustion failure can quickly create an indoor-air hazard. Placing CO alarms correctly gives your household early warning because carbon monoxide can’t be seen or smelled. These practical safety tips support prevention, but alarms aren’t a substitute for professional inspection, proper ventilation, or safe operation.
Follow EPA guidance and start with the home layout. Place alarms where they can wake sleeping people, not where heat, humidity, or airflow may trigger nuisance alerts. Then account for the heating equipment room.
Key Takeaways
- Install a carbon monoxide alarm on every level of the home and outside or near sleeping areas so it can wake occupants.
- Keep an alarm roughly 15 feet from a gas furnace and other fuel-burning appliances, unless the device instructions or local code require a different distance.
- Mount the detector where the model permits, commonly about five feet above the floor on a wall, and keep it away from kitchens, bathrooms, vents, excess humidity, and dead-air corners.
- Test alarms monthly, replace batteries or units as directed, and arrange professional furnace service when you notice soot, unusual odors, burner problems, or repeated shutdowns.
- If a CO alarm sounds or anyone feels ill, leave immediately, call emergency responders from outside, and don’t re-enter until the home is declared safe.
Where to Install a CO Alarm Near a Gas Furnace
Install a CO alarm on every level of the home, including a finished or unfinished basement. Put one outside or near sleeping areas, because an alarm needs to wake occupants before exposure becomes severe. The EPA’s carbon monoxide detector placement guidance also recommends alarms close enough to sleeping spaces to be heard.
Gas heating equipment in a closet, garage-adjacent utility room, or crawl space still calls for coverage on that level. A carbon monoxide detector should monitor the nearby occupied area, such as a living room. It shouldn’t sit directly over, beside, or inside the equipment compartment.

Keep a sensible distance from the equipment
Keep alarms roughly 15 feet from the heating unit and other fuel-burning appliances, including a water heater or fireplace. Mounting one directly over or beside equipment can expose an alarm to brief combustion byproducts and trigger a false alarm.
Roughly 15 feet is common in many manufacturer instructions and authority guidance, but it isn’t one universal legal distance. Final placement should follow the instructions for your model, applicable local building or fire code, and local fire authority guidance. If a jurisdiction or device requires another distance, that requirement takes precedence.
Avoid mounting it in a kitchen, bathroom, dusty utility closet, or directly in front of a supply register. Don’t cover an alarm with furniture, drapes, storage boxes, or paint, and keep it away from combustion exhaust and excess humidity.
A nearby CO alarm helps identify carbon monoxide danger, but placement doesn’t replace required alarms near bedrooms, proper ventilation, or a professional furnace inspection.
Ceiling, wall, or low on the floor?
Carbon monoxide mixes readily with indoor air. It doesn’t reliably sink to the floor, so placing an alarm low beside the equipment won’t improve carbon monoxide safety.
Older EPA guidance allowed ceiling mounting or wall mounting around five feet from the floor. Modern alarms can work in either location when the model permits it. When no model-specific height is provided, approximately five feet above the floor is a common wall-mount convention, not a universal rule. For reliable placement, follow the instructions for your exact model and local code, and avoid dead-air corners near ceilings.
Common CO Sources and Early Warning Signs
Gas heating systems are a major concern during heating season, but they aren’t the only source of carbon monoxide. Gas appliances, including fireplaces and ranges, are fuel-burning appliances that can produce carbon monoxide. Generators, charcoal grills, and vehicles running in an attached garage can also release carbon monoxide. The EPA warns that improperly used equipment can create a carbon monoxide hazard.
Never run a generator, grill, or fuel-burning engine indoors or near windows, doors, or vents, where carbon monoxide can collect. An attached garage also needs a detector near the interior door, since exhaust can enter the home even when the garage door is open.
Symptoms can look like the flu
Carbon monoxide has no color, taste, or odor. The CDC’s list of carbon monoxide poisoning symptoms includes headache, dizziness, weakness, nausea, vomiting, chest pain, and confusion.
These symptoms can resemble the flu, and no single symptom proves exposure. A person who feels unwell may have a headache and dizziness, while symptoms affecting several people at once deserve urgent attention. Pets may also become ill before adults notice a problem. Leave immediately if a CO alarm sounds, anyone feels sick, or anyone experiences dizziness.
Furnace clues that need prompt service
A brief dusty smell when heat starts after a long Alabama summer can be normal. A gas odor, soot, flame rollout, repeated burner bangs, or yellow and unstable burner flames are different.
Turn the thermostat off if you notice those signs. Do not remove burner parts, adjust gas pressure, or reset the heating system repeatedly. A detector does not diagnose the source of CO, so the heating system still needs a professional inspection.
Test Alarms and Respect Their Limits
Test each carbon monoxide detector by pressing its test button according to manufacturer instructions, commonly once a month. Use those instructions for battery replacement and end-of-life procedures, and replace the entire unit when it reaches its stated service life.
Many newer alarms have sealed 10-year batteries, while other battery-operated detectors use replaceable batteries. A chirp can mean a low battery, end of service life, or fault. Check the model label and operating manual for those issues, and use installation instructions for placement.
What a UL certified alarm can and cannot do
UL certified alarms, including those certified/listed to UL 2034, meet defined performance criteria, but certification doesn’t make them infallible. An alarm with an electrochemical sensor is designed to respond to carbon monoxide concentration and exposure time.
The threshold combines parts per million with exposure duration, so a low reading isn’t automatically safe. An alarm may not sound at every low-level carbon monoxide reading because the standard considers health risk over time. UL’s code guidance explains that alarm sensitivity testing relates to carboxyhemoglobin in the blood.
That means you should never wait for an alarm before addressing a gas smell, soot, or furnace malfunction. A smoke detector doesn’t detect carbon monoxide unless it’s certified for that function. A combination smoke and CO alarm can cover both functions, but it must be certified for both. Also, don’t rely on a phone app or thermostat as a substitute for an alarm.
What to Do When a CO Alarm Sounds
Treat a sounding carbon monoxide detector as an emergency. Leave immediately, and don’t investigate the equipment room before going outside.
- Move everyone, including pets, into fresh air outside immediately, away from possible carbon monoxide exposure.
- Call 911, the fire department, or the gas utility from outside the home.
- Do not re-enter until responders declare the home safe and clear of carbon monoxide.
- Arrange professional system testing and repair before operating it again.
Interconnected alarms add protection because every unit sounds when one detects danger. For example, an alarm system can alert the home if a detector near an interior garage entry sounds. Routine testing still matters, but it should never delay an emergency response. Kidde’s CO alarm placement recommendations also support alarms on each level and outside sleeping areas.
Furnace Service Helps Prevent CO Problems
Annual maintenance gives qualified technicians time to inspect the unit before winter use. Annual service can include burners, the heat exchanger, other combustion components, venting, combustion air, drains, wiring, safety controls, and ventilation. A clean filter supports airflow, but it can’t correct blocked venting, a cracked component, inadequate combustion air, or poor combustion.
At Northport HVAC, we recommend professional furnace service in Northport and Tuscaloosa when a heating system has unusual odors, ignition problems, soot, or repeated shutdowns. Our local HVAC technicians inspect the equipment rather than guessing at a part. An alarm and professional inspection address different parts of the carbon monoxide risk.
When your home uses gas appliances, professional service should consider the complete combustion setup, not only the alarm. A qualified technician can identify conditions that contribute to carbon monoxide concerns, while following local requirements supports a safer setup.
Frequently Asked Questions
How far should a carbon monoxide detector be from a gas furnace?
A distance of roughly 15 feet is common for alarms near furnaces and other fuel-burning appliances. Always follow the detector manufacturer’s instructions, local building or fire code, and local fire authority guidance if they specify a different distance.
Should a CO detector be mounted on the ceiling or wall?
Carbon monoxide mixes with indoor air, so it doesn’t need to be placed low near the floor. Use the location and height allowed by the model instructions; when no specific height is provided, about five feet above the floor is a common wall-mount convention.
How many carbon monoxide detectors does a home need?
Install at least one alarm on every level, including the basement, and place one outside or near sleeping areas. Additional coverage may be needed near an attached garage or according to local requirements and the home’s layout.
What should I do if the carbon monoxide alarm sounds?
Move everyone, including pets, outside immediately and call 911, the fire department, or the gas utility from fresh air. Do not re-enter until responders declare the home safe, and arrange professional testing and repair before operating the furnace again.
A Safer Setup Starts With Location
Good carbon monoxide detector placement puts alarms on every level and near bedrooms. Distance from a gas-fired appliance depends on the manufacturer’s directions for that model, local code, and authoritative fire-safety guidance. Place alarms in all required locations, and keep furniture or airflow from interfering.
A working CO alarm and a professionally inspected furnace protect different parts of the same carbon monoxide safety problem. Proper ventilation and professional inspection provide complementary protections. Detector placement doesn’t replace any of them, so keep each safeguard in good condition before the next heating season.
HVAC Static Pressure and the Airflow Problems It Causes
Your air conditioner can run for hours while a bedroom stays warm because airflow is fighting too much resistance. HVAC static pressure tells us how hard the blower must push air through the filter, coil, ducts, and vents.
At Northport HVAC, we often find that weak airflow, high utility bills, and uneven temperatures point to problems with energy efficiency and temperature control. Proper pressure supports dependable heating and cooling, while restrictions can strain equipment every time it starts.
The first step is separating a simple filter issue from a duct static pressure concern or equipment airflow problem. A technician can verify the cause with a static pressure tip before recommending repairs.
Key Takeaways
- HVAC static pressure measures resistance to airflow through the filter, evaporator coil, ducts, and vents—not the amount of air moving through the system.
- High total external static pressure can cause weak airflow, uneven temperatures, loud operation, frozen evaporator coils, furnace limit-switch trips, and added equipment strain.
- Technicians use a dual-port digital manometer and static pressure tips to compare return and supply readings with the equipment manufacturer’s limits.
- Homeowners can start by replacing the correct air filter, keeping registers open, clearing return grilles, and checking accessible ductwork for damage or restrictions.
- A measured diagnosis is important because high or low static pressure can result from different problems, including undersized ducts, leakage, blocked components, or poor system balance.
Static Pressure Measures Resistance, Not Air Volume
Duct static pressure measures the airflow resistance air meets inside a forced-air system, not the amount of air moving through it. Filters, the evaporator coil, return grilles, duct turns, crushed flex duct, and closed registers can all add resistance. Dirt buildup on the evaporator coil can add resistance as well.
As duct static pressure rises, the blower motor has to work harder, and its fan curve may deliver less air. Variable speed motors can adjust output, but they can’t overcome a restricted air path. Rooms may heat or cool unevenly, reducing system performance.
In cooling mode, low airflow can freeze the evaporator coil. During heating, it can overheat the heat exchanger and cause repeated limit-switch trips.
Where total external static pressure comes from
Technicians call the combined supply and return measurement total external static pressure, or TESP. A static pressure tip senses pressure at a test point. The return side reading is usually negative because the blower pulls air inward. The supply side reading is positive because the blower pushes air outward.
Both the return side and supply side readings contribute to the total, so technicians add their magnitudes. Many residential systems use 0.5 inches of water column, written as in. w.c., as a common benchmark. However, the equipment manufacturer’s external static pressure limit matters more than that generic benchmark.
Static pressure vs. dynamic pressure
Dynamic pressure relates to air velocity while air is moving. Duct static pressure describes the resistance within the duct system and equipment path.
A system can have air coming from the vents and still have excessive duct static pressure. That is why airflow complaints need measurements, not assumptions.
Warning Signs of High Static Pressure at Home
High static pressure rarely announces itself with one clear symptom. Instead, several comfort problems tend to show up together as duct static pressure rises.

Photo by RDNE Stock project
Patterns that point to an airflow restriction
Watch for these signs, especially when more than one occurs:
- Several rooms have weak airflow, even with the thermostat set correctly.
- The system is loud at the return grille, or ducts pop when the blower starts.
- Filters turn gray or become bowed sooner than expected.
- Cooling runs for long periods, yet a dirty or frozen evaporator coil leaves humidity and room temperatures uncomfortable.
- The furnace cycles off before the home reaches the thermostat setting.
- Ice forms on refrigerant lines or near the evaporator coil.
When several signs appear together, ask a technician to check duct static pressure. A clogged air filter is a common starting point because it chokes the return-air path. A restrictive filter can also cause trouble if its design does not match the system’s available pressure capacity.
Closing several supply vents raises resistance and often reduces total airflow. It does not reliably force more comfort into another room.
If you have ice, warm supply air, repeated shutdowns, or a breaker that trips, turn the system off and arrange emergency AC repair. Continued operation can turn an airflow problem into equipment damage.
How Technicians Measure System Static Pressure
A duct static pressure reading gives us a starting point, not a repair recommendation. We compare it with the manufacturer’s blower data and fan curve, then locate the source of the resistance.
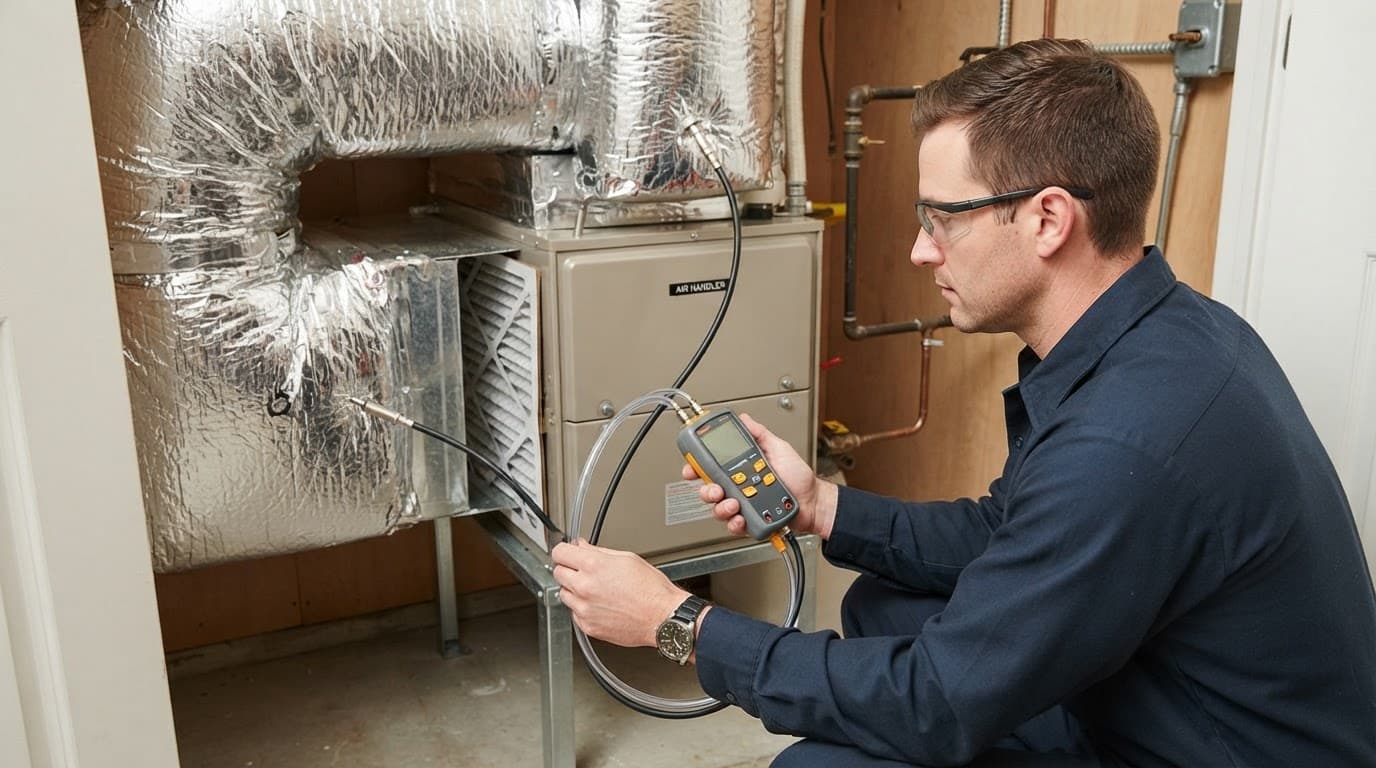
The tools and test process
A technician uses a dual-port digital manometer, manometer hoses, and a static pressure tip. With the blower operating, we place one static pressure tip at the return side test point and another static pressure tip at the supply side test point. The digital manometer records both readings, which we compare with equipment limits for external static pressure before calculating total external static pressure from the recorded duct static pressure.
Some systems use a static pressure sensor for ongoing equipment monitoring, but it doesn’t replace technician readings at approved test points.
Next, we may measure the pressure drop across individual components, including the air filter and evaporator coil. This comparison helps isolate a restriction at the evaporator coil from a filter problem.
A dirty evaporator coil can act like a dense screen, limiting air before it enters the supply ducts. We also inspect the evaporator coil surface for dirt, bent fins, or blocked passages.
Homeowners should not drill test holes into equipment cabinets or adjust blower settings. Incorrect locations can produce misleading readings, and exposed electrical parts create a safety risk.
Why one number never tells the whole story
A high reading can come from an undersized return, a blocked grille, a matted coil, a tight filter, or ductwork that is too small for the equipment. We trace the restriction instead of replacing parts by guesswork.
Low static pressure also needs context. A low duct static pressure reading can point to major duct leakage, an open bypass, a missing filter, or a poorly balanced duct layout. The goal is correct airflow, not simply the lowest possible number.
Fixing Airflow Restrictions Without Creating New Ones
Start with the safe, visible items. These checks may reduce duct static pressure by removing basic restrictions. They don’t require homeowners to open the HVAC cabinet or take internal measurements.
Safe steps homeowners can take
- Replace a dirty air filter with the correct size, installed in the direction shown on its frame. Our guide on how often to change HVAC filters can help you choose a practical schedule.
- Keep supply registers open and move furniture, curtains, and storage away from return grilles.
- Inspect accessible duct connections for loose collars, crushed flex duct, missing insulation, or peeling tape.
- Remove leaves and debris around the outdoor condenser, but don’t pressure-wash delicate coil fins.
Standard gray cloth-backed duct tape is not a lasting duct repair. West Alabama heat and humidity can dry out its adhesive. Proper repairs use secure mechanical connections, mastic, or approved UL 181-rated foil tape.
When the duct system needs professional work
A dirty evaporator coil may need professional cleaning, while a damaged duct run may need replacement or better support. Before cleaning, a technician inspects the evaporator coil for buildup and damage. After cleaning, the technician verifies the evaporator coil is clean and unobstructed. Undersized ductwork can require a larger return path, resized trunk line, or a ductwork design update based on measured airflow.
Duct cleaning can remove heavy debris, but it cannot repair a loose joint, a split seam, or a collapsed duct. Likewise, a duct-blaster test measures leakage in cubic feet per minute at 25 Pascals, reported as CFM25, while duct static pressure testing identifies resistance. Both tests can be useful, but they answer different questions.
After the restriction is corrected, a technician can verify the repair with a static pressure tip. Our NATE-certified local HVAC technicians use those results to explain the problem in plain language before recommending repairs.
Frequently Asked Questions
What is HVAC static pressure?
HVAC static pressure measures the resistance air encounters as it moves through the filter, coil, ducts, and vents. It does not measure the total volume of air moving through the system.
What causes high static pressure in an HVAC system?
Common causes include a dirty or overly restrictive filter, a blocked return grille, a dirty evaporator coil, undersized ductwork, crushed flex duct, and closed supply registers. Several restrictions can occur at the same time and increase the blower’s workload.
How do technicians measure static pressure?
Technicians use a dual-port digital manometer, hoses, and static pressure tips at approved return and supply test points. They compare the readings with the equipment manufacturer’s external static pressure limits and may test individual components to locate the restriction.
Can homeowners reduce HVAC static pressure safely?
Homeowners can replace a dirty filter with the correct size, keep supply registers open, clear furniture from return grilles, and inspect accessible duct connections. Internal cabinet work, blower adjustments, and test-hole installation should be left to a qualified technician.
Is low static pressure also a problem?
It can be, depending on the system and the cause. Low readings may point to duct leakage, an open bypass, a missing filter, or an improperly balanced duct layout, so the goal is correct airflow rather than simply the lowest possible pressure.
Final Thoughts on Static Pressure
Lasting comfort starts with air that can move freely through the entire system. A clean filter and open vents may solve a minor restriction, but recurring noise, ice, hot rooms, or weak airflow need a measured diagnosis.
For Northport, Tuscaloosa, Coker, and nearby West Alabama homes, our Tuscaloosa air conditioning service can identify whether the cause is HVAC static pressure, duct static pressure, a dirty evaporator coil, or poor system performance. The right repair protects the evaporator coil while restoring airflow, supporting energy efficiency, and delivering dependable comfort.
AC Condensate Pump Failure: Signs and Safe Next Steps
Water near your indoor AC equipment can cause water damage, stained ceilings, or damaged flooring. A full reservoir, unusual humming, or an air conditioner that stops without warning can point to AC condensate pump failure.
The condensate pump collects moisture removed from indoor air and sends it to a safe drain location when gravity can’t move water through the drainage system. In West Alabama’s humid summer weather, that small pump may move a surprising amount of water. The signs below can help protect your home and show when to call for service.
Key Takeaways
- A full reservoir, nonstop humming, standing water, unusual heat, or an unexpected AC shutdown can indicate a condensate pump or drainage problem.
- Check the thermostat, plug, GFCI outlet, accessible tubing, and visible buildup safely, but never bypass a float switch or safety shutoff.
- A clogged discharge line, stuck check valve, or algae-covered inlet screen can mimic a failed pump and may require a simpler repair.
- Turn the system off and call for professional service when water reaches electrical equipment, the line is concealed, the pump overheats, or the reservoir will not empty.
Signs of a Failing Condensate Pump
A condensate pump usually operates quietly and only when its reservoir reaches a set level. When that pattern changes, water may already be backing up.
A full tank, silence, or nonstop humming
A pump that doesn’t run when the tank is nearly full may have lost power, developed a stuck float switch, or suffered a motor failure. Check for a loose plug or tripped GFCI outlet before assuming it’s a broken pump.
On the other hand, a condensate pump that hums or runs constantly without lowering the water level often has a blocked discharge line or failed check valve. A clogged line can mimic a broken pump, even when the motor still runs.
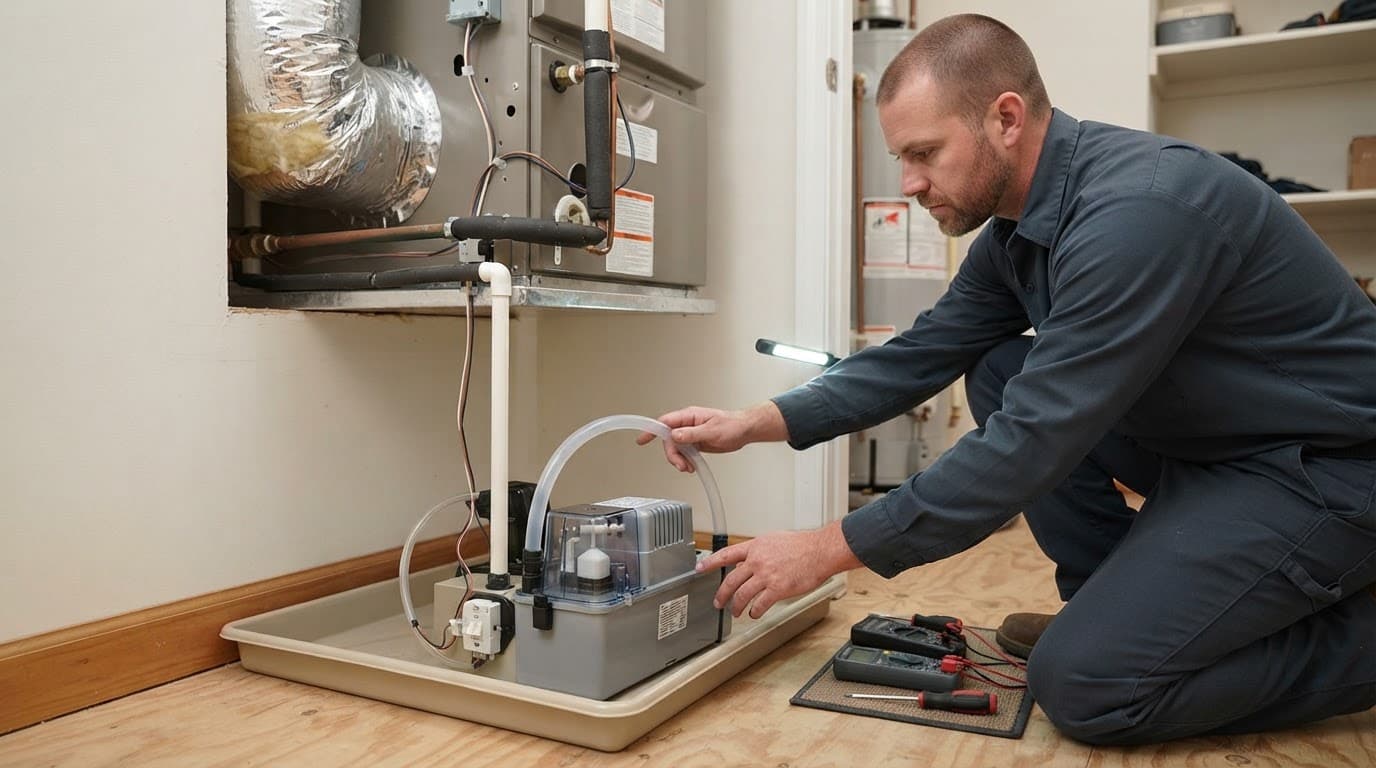
Water, odors, and unexpected system shutdowns
Look for water on the floor, damp insulation, rust around the equipment base, or a musty odor near the air handler. These signs may indicate an overflow and water damage.
Algae buildup can block the pump’s inlet screen, the reservoir outlet, or the connected drain tubing.
Many systems also have a safety float switch. When water rises too high in the reservoir, it triggers a system shutdown to protect the HVAC system.
A sudden air conditioner shutdown with water in the pump tank may be the safety control doing its job.
A safety shutdown is a warning, not a problem to bypass. Restarting the system without correcting the backup can send water into the air handler or ceiling.
Why the Condensate Pump Reservoir Holds Water
Standing water inside the tank doesn’t always mean the pump has failed. A small amount may remain after a pumping cycle, especially with a low outlet opening or longer discharge tube.
The concern is a water level that keeps rising, reaches the lid, spills into a pan, or remains high while the pump runs. That pattern can lead to overflow and water damage.
Normal water versus a growing backup
During cooling, the air conditioner’s evaporator coil pulls moisture from indoor air, and that water flows into the reservoir. When the float switch rises, the condensate pump should turn on and move most of the water through the discharge line.
A little water at the bottom is normal, but a nearly full tank is not. A restricted inlet screen can mimic a broken pump, so a high water level doesn’t confirm mechanical failure. Continued cooling can keep adding condensate while the pump can’t discharge it, causing the backup to grow.
Why the water may feel warm or hot
Warm water can come from the equipment area, especially when the pump sits beside a working air handler. However, hot water and a hot pump housing can indicate a pump motor running against a restriction.
A blocked discharge path makes the motor work longer without moving water. Turn the thermostat off if the pump feels excessively hot, smells electrical, or trips a breaker. Let the equipment cool before anyone inspects it.
Telling a Clogged Line From a Broken Pump
A condensate pump can imitate a failed motor when its discharge line or valve is restricted. These diagnostic steps support troubleshooting before replacement. Follow the water path and compare how the equipment responds.
| What you notice | Likely source | Safe response |
|---|---|---|
| Reservoir is full and the pump stays silent | Lost power, stuck float switch, failed motor | Check the plug and GFCI once, then schedule service to prevent water damage if it will not run. |
| Pump runs but the water level does not fall | Clogged discharge line or check valve | Shut the system down and inspect accessible tubing for kinks or blockage. |
| Water flows out, then returns to the tank | Valve is stuck or installed incorrectly | Inspect the valve direction and arrange replacement if it will not hold. |
| Pump empties the tank, yet water collects near the air handler | Separate primary drain or pan issue | Have the indoor drain and evaporator section checked. |
A motor can fail, but a clogged vinyl tube is often the simpler repair. If it runs without moving water, a technician may test the impeller, but the pattern matters more than the sound alone.
Checking the discharge line and check valve
With the thermostat off and the pump unplugged, inspect only the accessible tubing. Look for sharp bends, crushed sections, loose joints, or an exposed section that could freeze during winter operation.
If the valve is accessible, place a towel and shallow container beneath it before removal. Most valves have a directional arrow. Clean water should pass toward the drain outlet, while the check valve should resist flow back toward the pump. Replace the valve if it stays stuck, leaks backward, or remains clogged after gentle rinsing.
Don’t force compressed air into a discharge line that disappears into a wall, attic, or ceiling. A technician can trace the route and clear it without blowing a loose connection apart.
Safe Checks Before Calling for AC Service
Start by protecting the home, not by repeatedly resetting the air conditioner. Water and electricity do not mix well. A system shutdown helps limit additional water near the equipment.
Check power and the accessible float switch
First, set the thermostat to off. Place towels around the pump if water has escaped or the reservoir is full. Unplug the condensate pump only if the cord, outlet, and floor are dry.
Check whether the plug has worked loose. If it connects to a GFCI outlet, reset that outlet once. A GFCI that trips again may indicate a pump or electrical problem and needs professional attention.
After unplugging the pump, remove the cover only if it lifts off easily and doesn’t require removing HVAC panels. If visible, clear sludge around the float and inlet screen with a soft cloth. Never pull on the float switch wiring, jumper it, or bypass the safety shutoff to keep the system running.
Look for a clear path to the outlet
Trace the discharge line from the pump as far as you can safely see. Outdoor outlet ends can clog with mud, mulch, insects, or leaves. Check exposed vinyl tube for kinks, crushed sections, or ice. If the tube is frozen, leave the AC off and warm the section gradually with a warm, damp towel.
Do not use an open flame, boiling water, a pressure washer, or sharp tools. Those methods can split plastic tubing or cause a hidden leak. We recommend calling for diagnosis when the route is concealed or there is a recurring overflow from the pump. Call promptly if the indoor unit has leaked into a ceiling and caused water damage.
For severe leaks, no cooling during dangerous heat, or water near electrical equipment, use same-day AC service in Tuscaloosa rather than letting the system run.
Cleaning the Pump and Preventing Slime Buildup
A clean tank gives the float switch room to move and slows algae buildup. During peak cooling season, humidity keeps the pump active, so a quick inspection can prevent a surprise overflow.
Cleaning the reservoir and inlet screen
Turn off the thermostat and unplug the condensate pump before cleaning. Remove the reservoir only if it detaches without disturbing fixed wiring or drain connections. Empty it into a sink or suitable drain, then rinse away loose debris.
Warm water can help loosen slime from a removable tank. We prefer a manufacturer-approved condensate cleaner over pouring bleach into a connected pump assembly. A bleach solution can create irritating fumes and should be used only if the manufacturer permits it. Never mix it with other cleaners, and rinse the tank thoroughly. Manufacturer-approved treatment tablets may also be suitable, but use them only if the pump instructions allow them.
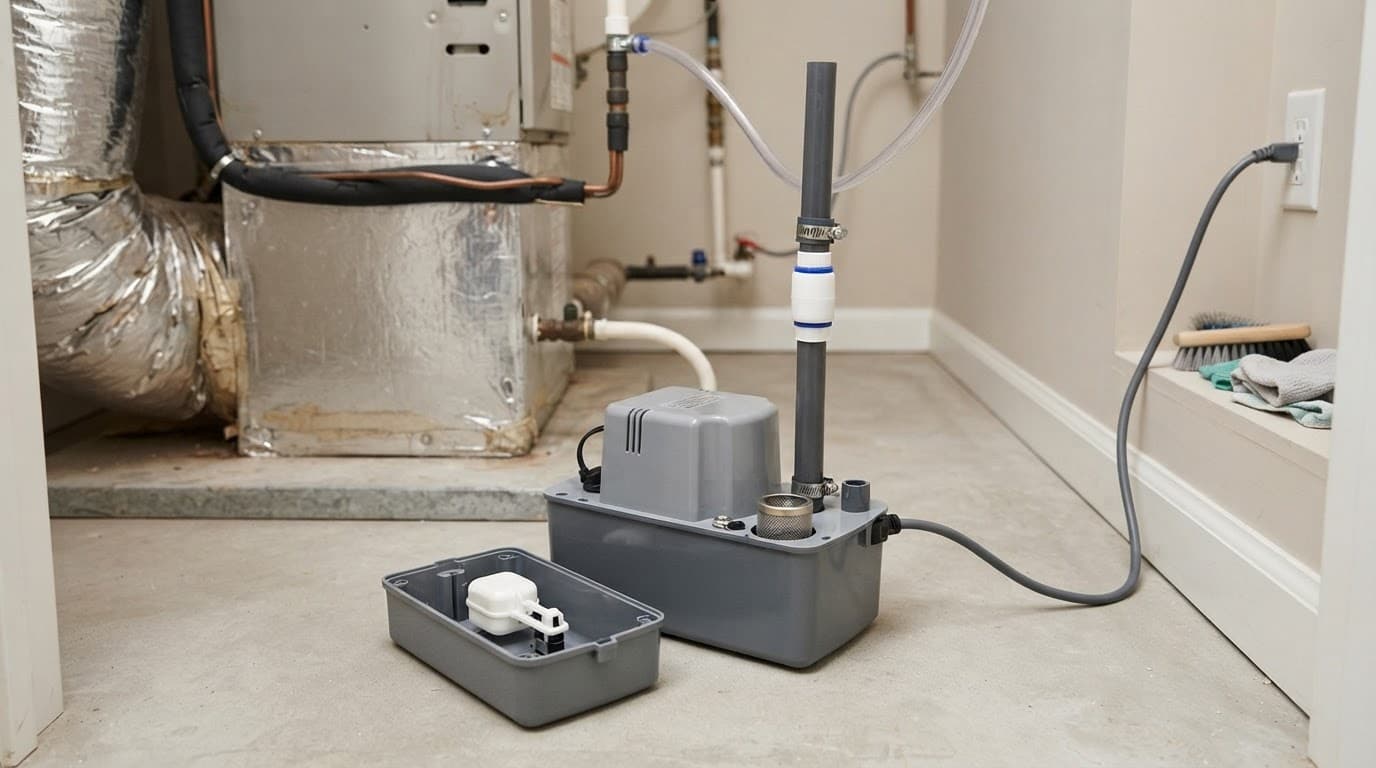
Clean the inlet screen gently with water and a soft brush. Then reassemble the unit, restore power, and watch one full condensate pump cycle. If cleaning doesn’t restore a complete cycle or the water level doesn’t drop, stop testing. Have a technician evaluate the impeller instead of opening the motor assembly.
Build drainage checks into routine maintenance
We suggest checking the pump tank and visible drain tubing monthly during heavy AC use. Add annual cleaning to your maintenance routine, even when the unit appears to operate normally.
A professional maintenance visit should also include the primary condensate drain, discharge line, evaporator coil, airflow, and safety controls.
A dirty filter can contribute to frozen coils and extra water once the ice melts. Follow a realistic replacement schedule with this guide on how often to change HVAC filters, especially if you have pets, allergies, or renovation dust.
When Replacement and Professional Repair Make Sense
A new condensate pump may be sensible after basic power checks fail. Replacement may also make sense when the float mechanism is damaged or the unit overheats despite a clear drain tube. Repeated backups can justify replacement before water damage reaches drywall or flooring.
Repair decisions should follow a confirmed diagnosis
A clogged tube or stuck check valve may only need targeted service. A cracked tank or burned pump motor can indicate a broken pump. An unreliable safety switch may also make replacement safer than repair.
The price depends on access, line routing, pump capacity, and lift height. It also depends on whether a technician needs to add a safety shutoff. Ask for a written explanation of the failed part. Compare the confirmed failure, access, lift height, and replacement cost before deciding whether to repair or replace.
At Northport HVAC, our licensed and insured, NATE-certified local HVAC technicians diagnose drainage problems in your HVAC system. They service Trane, Carrier, Rheem, Lennox, Goodman, and Mitsubishi systems. Homeowners seeking AC repair in Northport, AL deserve clear findings and upfront pricing, especially when water has reached the floor.
Safety switches protect more than the pump
An auxiliary float switch can shut down cooling when water rises in a secondary drain pan or equipment drain line. This safety shutoff helps prevent water damage, especially around attic air handlers where water can damage ceilings below.
A technician should install and test the float switch with the low-voltage controls. This confirms the HVAC system stops cooling safely when water rises. Don’t bypass it to restore cooling.
Tuscaloosa air conditioning systems work hard through long humid stretches. A reliable drainage system helps keep heating and cooling equipment running safely.
If the system will not cool, water is spreading, or a pump has an electrical smell, call for AC repair warning signs in Northport. Request emergency AC repair when needed.
Frequently Asked Questions
How do I know if my AC condensate pump has failed?
A full reservoir with no pumping, nonstop humming without a falling water level, standing water, or an unexpected system shutdown can point to a pump or drainage failure. Check accessible power and tubing once, then schedule service if the problem continues.
Can I keep running the air conditioner when the pump is full?
No, continued cooling can add more condensate and cause an overflow near the air handler, ceiling, or flooring. Turn the thermostat off and do not bypass the safety float switch while arranging a diagnosis.
Is a small amount of water in the condensate pump normal?
A small amount may remain after a pumping cycle, especially with a low outlet opening or a long discharge tube. A level that keeps rising, reaches the lid, spills into a pan, or stays high while the pump runs indicates a backup.
Should I repair or replace a failed condensate pump?
Repair may be appropriate for a clogged tube, stuck check valve, or dirty inlet screen. A cracked tank, damaged float, burned motor, overheating, or repeated backups may make replacement the safer choice after a confirmed diagnosis.
A Small Pump Can Prevent a Large Water Problem
An AC condensate pump failure often gives early clues, including nonstop humming, a warm housing, or standing water where it shouldn’t be. Acting at the first sign can protect your system and home.
Check accessible power, tubing, and buildup without opening electrical panels or defeating safety controls. If it won’t empty, the line disappears into the home, or water reaches the air handler, professional testing is the safer next step.
Indoor Air Quality Assessment: What HVAC Technicians Measure
Recurring headaches, stale bedrooms, damp odors, and fast-returning dust shouldn’t become part of normal home life. A thorough indoor air quality evaluation connects those clues to measurable HVAC performance, moisture, and pollutant conditions. It helps trace likely causes and identify air contaminants, without promising a medical diagnosis.
West Alabama heat and humidity put extra pressure on ducts, drain lines, filters, and cooling equipment, affecting your indoor environment. We start by looking at how your home moves, filters, and manages air before deciding which pollutant tests will give useful answers.
Key Takeaways
- An indoor air quality assessment connects recurring odors, dust, moisture, comfort concerns, and symptoms to measurable HVAC and building conditions without diagnosing a medical issue.
- HVAC technicians should evaluate airflow, filtration, pressure, ventilation, humidity, drainage, and accessible ductwork before recommending specialized pollutant testing.
- Air quality monitors can reveal trends in particles, carbon dioxide, humidity, temperature, and sometimes TVOCs, but they cannot identify every contaminant or replace an HVAC inspection.
- Laboratory testing is most useful for focused questions involving concerns such as mold, formaldehyde, volatile organic compounds, or radon.
- Correcting moisture sources, restoring airflow, improving filtration, and addressing combustion risks should come before relying on air purifiers or dehumidifiers.
When an Indoor Air Quality Assessment Is Worth Scheduling
An assessment makes sense when a comfort or health concern keeps returning despite normal cleaning and filter changes. It also helps after a leak, renovation, HVAC breakdown, or a long period of high indoor humidity.
Symptoms and building clues to track
Poor indoor air quality may contribute to irritated eyes, coughing, headaches, fatigue, respiratory issues, worsened allergies, and asthma symptoms. These symptoms can have many causes, so they’re possible clues, not proof of an indoor cause.
However, recurring patterns can justify an environmental health investigation without diagnosing occupants. If symptoms improve away from the building, several building occupants notice them, or a room has a persistent musty smell, the building deserves a closer look.
Other useful clues include signs of mold and moisture, condensation on windows, water near an air handler, uneven room temperatures, visible staining, or dust collecting near supply vents. We ask when the issue occurs, what changed before it began, and how humidity levels vary with weather and HVAC operation.
A timeline gives test results meaning
Write down recent painting, new flooring, pest treatments, water damage, renovations, and changes to household products. Also note whether problems worsen during rain, when the AC runs, or after cooking.
For landlords and property managers, document tenant reports alongside repair dates and water events so building management can track the pattern. Air samples are only snapshots, while a clear timeline can reveal a pattern that testing confirms.
What HVAC Technicians Measure First
Rather than beginning with a laboratory sample, we first evaluate conditions shaping indoor air quality.
That includes airflow, filtration, moisture control, and ventilation systems.
An air quality monitor can show trends, but it doesn’t replace HVAC measurements of indoor air movement or fresh outdoor air delivery before ordering specialized tests.
Airflow, pressure, and filtration
Restricted airflow often links comfort complaints to air quality concerns. We inspect air filters for type, fit, and system compatibility, along with return grilles, accessible ducts, blower performance, coil condition, and supply airflow at individual registers.
A digital manometer can measure static pressure across the system. High pressure may point to a restrictive filter, blocked return, dirty coil, undersized duct, or too many closed registers.
A duct blaster can also test leakage. It reports air loss in CFM25, meaning the airflow needed to hold the duct system at 25 Pascals during testing.
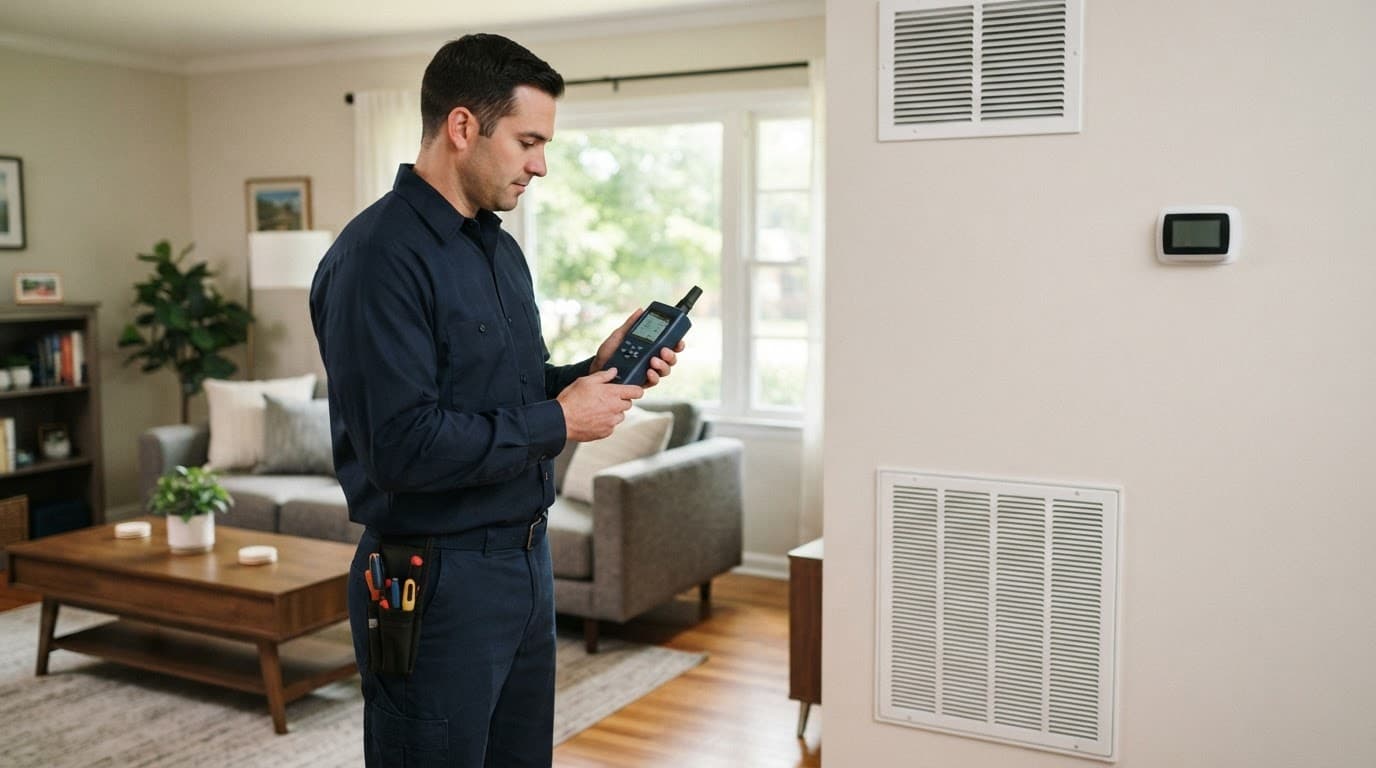
A duct leakage result in CFM25 measures air escaping under controlled pressure. It does not show how much air reaches one bedroom register.
Temperature, humidity, and moisture conditions
Relative humidity affects comfort, mold risk, dust mites, and how well the cooling system removes moisture. We compare humidity levels in several rooms with the thermostat setting, equipment runtime, drain condition, and accessible insulation.
The EPA recommends keeping humidity levels below 60%, with 30% to 50% as a practical target range for many homes. High humidity can come from an oversized system, low airflow, duct leakage, crawl-space moisture, or a blocked condensate drain.
How Air Quality Testing Moves Beyond a Basic Screen
A sound monitoring strategy uses the method that fits the concern. Continuous monitors can reveal indoor air quality trends, while lab work can identify a specific contaminant after a focused inspection.
Monitors reveal daily patterns
An air quality monitor can track particulate matter, carbon dioxide, temperature, humidity, and sometimes volatile organic compounds (TVOCs). The Airthings View Plus is one consumer monitor that also tracks radon levels relevant to radon exposure.
Place the air quality monitor away from supply vents, direct sunlight, kitchens, and humidifiers so it reflects the broader indoor environment. Watch the air quality monitor for several days to capture normal trends. The air quality monitor shows PM2.5 particulate matter, not its source; cooking-related spikes differ from wildfire smoke or heavy pollen.

Photo by Tim Witzdam
Laboratory samples answer narrow questions
Targeted laboratory work can investigate indoor air quality when a monitor points to a pattern that needs closer study. Professional testing can use air samples to check for formaldehyde, individual volatile organic compounds, mold-related concerns, and other air pollutants. Sampling should follow a plan that considers room use, outdoor conditions, HVAC operation, and likely contaminant sources.
Radon also needs a dedicated test to evaluate radon exposure. It is a naturally occurring radioactive gas that can enter through soil and foundation openings. The EPA recommends fixing homes at radon levels of 4 picocuries per liter (pCi/L) or higher.
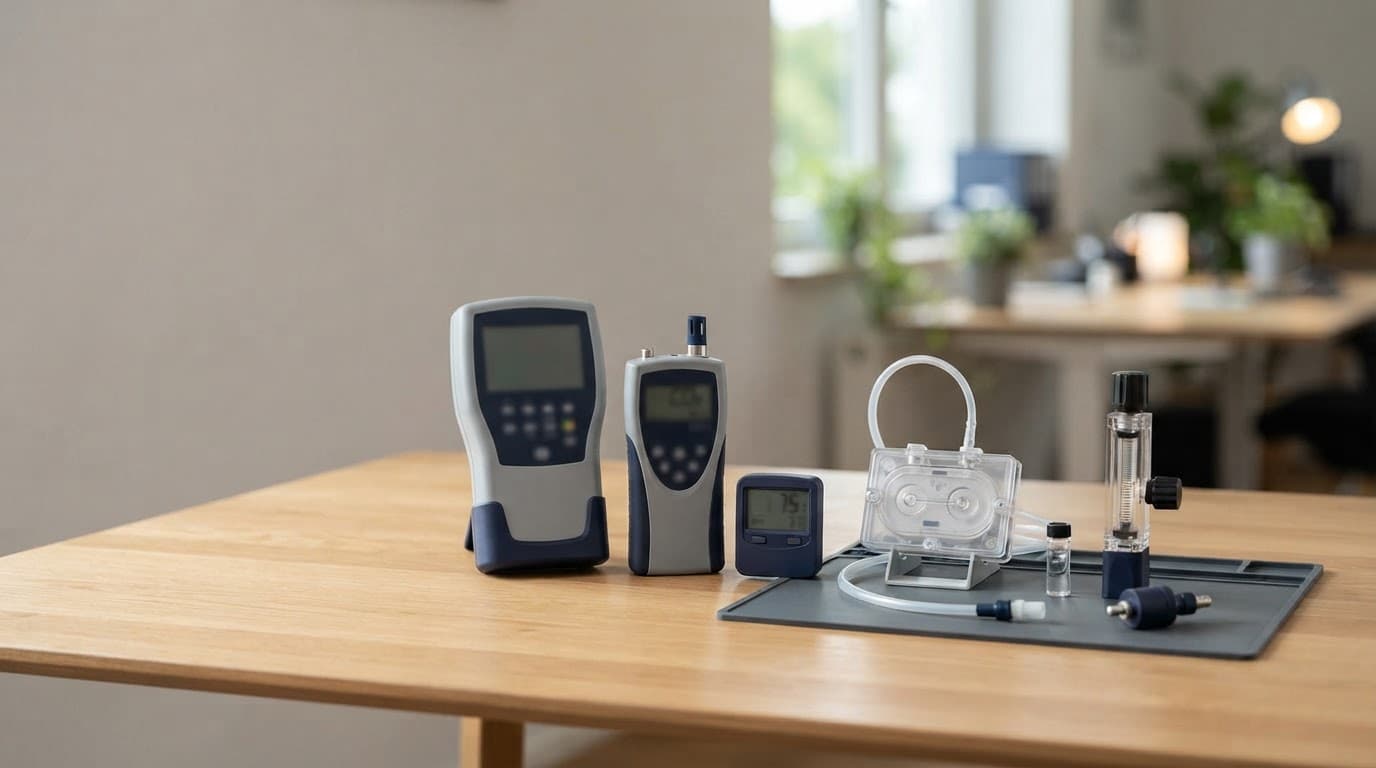
Common Causes of Poor Indoor Air
Air contaminants rarely come from one dramatic source. More often, several modest contaminant sources combine over time, including HVAC issues, moisture problems, outdoor pollutants, and household activities. Together, they can gradually affect indoor air quality.
Moisture damage and mold growth
A wet crawl space, plumbing leak, failed roof flashing, blocked condensate line, or poorly insulated duct can raise indoor moisture. Mold and moisture problems can follow when materials stay wet, allowing growth on drywall, insulation, carpet backing, and framing.
An air sample cannot reliably rule out mold hidden behind a wall. We look for the moisture source first, because cleaning odors or running a purifier won’t correct ongoing water damage.
Particles and chemical pollutants
Particulate matter includes airborne particles, and PM2.5 is small enough to enter deep into the lungs. Cooking smoke, candles, tobacco smoke, outdoor air pollutants, construction dust, and poorly filtered return air can all raise particle levels. Elevated particles can aggravate respiratory issues, especially for sensitive people.
Volatile organic compounds can come from paint, flooring, cleaning products, air fresheners, furniture, and stored fuels. Those materials can release chemical vapors. A TVOC reading can show that chemical emissions changed, but it does not identify the exact chemical or its health risk.
Combustion and garage-related risks
Fuel-burning furnaces, gas appliances, fireplaces, and attached garages require special care. Technicians inspect combustion equipment, venting, air intake, and carbon monoxide conditions during a wider safety review for related health hazards.
Carbon monoxide has no color or odor. If a CO alarm sounds, leave the home and call 911, the fire department, or your gas utility from outside. Do not wait for an air test or try to silence the alarm.
Indoor Air Quality Numbers Need Context
Measurements help, but one number never tells the whole story. When interpreting indoor air quality readings, we consider the indoor environment, home operation, occupant concerns, and the applicable testing standard. An air quality monitor can add context by showing whether readings persist or change.
| Reading | What it may indicate | Useful comparison point |
|---|---|---|
| Relative humidity | Moisture control, comfort, mold risk | Aim for 30% to 50%; keep below 60% |
| PM2.5 | Cooking, smoke, outdoor air, filtration | Some LEED certification IAQ protocols use 12 µg/m3 |
| Formaldehyde | New materials, furniture, finishes | 27 ppb appears in LEED certification assessment criteria |
| Carbon monoxide | Combustion or vehicle exhaust concern | 9 ppm over eight hours is a common EPA benchmark |
| Carbon dioxide | Occupancy and ventilation conditions | Compare trends with outdoor levels and room use |
Carbon dioxide is useful as a ventilation clue, but it isn’t a universal safety score for every room. A crowded conference room, closed bedroom door, fresh outdoor air, and limited air exchange can all affect it. An air quality monitor becomes more useful when you compare its trends with room use and system operation.
Ozone needs similar care. The EPA’s eight-hour outdoor ozone standard is 0.070 ppm, while project-specific indoor criteria can differ. We don’t recommend ozone-generating machines in occupied homes to remove odors.
When Home Monitoring Isn’t Enough
An air quality monitor gives you a helpful baseline for indoor air quality, especially when tracking moisture or ventilation patterns. It cannot inspect a dirty coil or diagnose a duct restriction.
An air quality monitor also can’t determine whether air filters are restrictive or poorly fitted. It can’t tell when they’re overdue for replacement or find moisture inside a wall.
Use an air quality monitor to guide practical changes
Run the monitor before and after changing a filter, using kitchen exhaust, repairing a drain issue, or adjusting ventilation. That approach shows whether the change improved the trend.
For example, a sharp particle increase during cooking points toward source control and better exhaust ventilation. A constant moisture problem during cooling points toward equipment performance, ductwork, drainage, or building moisture.
Bring in the right professional
Professional testing is the better choice when you have potential health hazards, including:
- Persistent musty odors, recurring water damage, or visible mold growth.
- A carbon monoxide concern, soot, flame irregularities, or a combustion smell.
- Recurring respiratory issues in the same room or building.
- Workplace complaints, a commercial building investigation, or documentation needs for LEED certification.
OSHA does not have one universal indoor air quality standard for every workplace. However, employers still have applicable duties under the General Duty Clause and substance-specific rules related to occupational safety. Complex workplace investigations may require industrial hygiene expertise and air quality testing. Local HVAC technicians can diagnose mechanical causes in ventilation systems, while an industrial hygiene professional can coordinate the investigation and prepare its report.
At Northport HVAC, we evaluate HVAC airflow, drains, accessible ducts, filters, and equipment operation before recommending repairs. If the issue points to the system itself, our HVAC services in Northport, AL can address the underlying heating and cooling problem.
Fix the Source Before Adding More Equipment
Air purifiers and dehumidifiers can help improve indoor air quality in the right setting. Still, they work best after you correct the contaminant sources that keep introducing pollutants or moisture.
Restore airflow and filtration
Choose air filters in the size and type your equipment can handle, and replace them before they become packed with dust. Our guide on how often to change HVAC filters in Alabama can help you set a schedule based on pets, occupants, and filter type.
Keep return grilles clear, avoid closing multiple supply vents, and repair loose or crushed ducts. Standard gray duct tape often fails in attic heat and humidity, so proper duct repairs use mechanical fastening, mastic, or approved UL 181 foil tape.
Stop water and control humidity
Repair plumbing leaks and clear condensate drainage problems first. Address crawl-space moisture and control humidity levels before cleaning or replacing materials damaged by mold and moisture. Duct cleaning may remove heavy renovation dust, but it cannot repair a separated collar, failed duct seam, or wet insulation.
Weak cooling, frozen coils, and water around an air handler can also worsen humidity. Those problems often appear during a Northport AC repair call or a Tuscaloosa air conditioning service visit. If your system fails during dangerous heat, emergency AC repair may be the safer choice. An air quality monitor can help verify whether repairs improved indoor air over time.
Frequently Asked Questions
What does an indoor air quality assessment measure?
An assessment may measure airflow, system pressure, filtration, temperature, humidity, ventilation, and moisture conditions. Depending on the concern, it may also include monitoring or targeted laboratory testing for specific pollutants.
Is a home air quality monitor enough to identify the problem?
No. A monitor can show trends in particles, carbon dioxide, humidity, and other readings, but it cannot inspect a dirty coil, find hidden moisture, or diagnose a duct restriction. Use its data to guide practical changes and determine whether professional evaluation is needed.
When should indoor air quality testing include laboratory samples?
Laboratory samples are most useful when a focused inspection identifies a specific question about mold-related concerns, formaldehyde, volatile organic compounds, or another pollutant. Sampling should account for room use, outdoor conditions, HVAC operation, and likely contaminant sources.
What should I do if a carbon monoxide alarm sounds?
Leave the home immediately and call 911, the fire department, or your gas utility from outside. Do not wait for an air test or attempt to silence the alarm, because carbon monoxide has no color or odor.
Should I buy an air purifier before fixing my HVAC system?
Air purifiers and dehumidifiers can help in the right setting, but they work best after correcting the source of pollutants or moisture. Restore airflow, repair leaks and drainage problems, and address filtration or equipment issues first.
A Clearer Path to Healthier Indoor Air
A healthier indoor environment depends on controlled moisture, adequate airflow, source control, and measurements that fit the problem. An indoor air quality assessment has real value when it leads to a specific repair or habit change.
Track the symptoms and conditions you notice, then use monitoring or professional testing to confirm the likely cause. A measured diagnosis can turn a stale room, damp smell, or dust problem into a fixable home maintenance issue. It can also help identify recurring triggers associated with respiratory issues, without diagnosing a medical condition or adding equipment automatically.
Smart Thermostat Compatibility: Check Wiring Before You Buy
A smart thermostat can make daily comfort easier, but the wrong match can leave you without heat or cooling. Smart thermostat compatibility depends on your HVAC system’s voltage, controls, thermostat wires, terminal labels, and power needs, not wire colors alone.
Most Northport and Tuscaloosa homes with heating and cooling systems use 24-volt controls that work with common smart thermostats. Older heaters, specialty systems, and a C wire need a closer look before you order anything.
Use the manufacturer’s compatibility checker before ordering. If voltage, controls, or wiring are unclear, ask a local professional to verify the match.
Key Takeaways
- Most smart thermostats are designed for standard 24-volt HVAC controls, while high-voltage, millivolt, and proprietary systems usually need another solution.
- Terminal labels and equipment-side connections matter more than wire colors, so compare the thermostat wiring with the furnace, air handler, heat pump, or zone panel.
- Many Wi-Fi thermostats need a C wire for stable power; an unused conductor, a new thermostat cable, or a manufacturer-approved adapter may provide the right solution.
- Heat pumps, dual-fuel systems, staging, zoning, and accessories require model-specific compatibility checks and correct setup.
- Use the manufacturer’s compatibility checker before buying, and ask a local professional to verify unusual wiring or unclear voltage and controls.
Smart thermostat compatibility starts with voltage
Most smart thermostats work with 24-volt AC HVAC controls. That includes many gas furnaces, electric air handlers, central air conditioners, heat pumps, and oil-fired systems. Single stage heating is often straightforward, while two stage cooling may need more terminals and correct setup.
Voltage and terminal labels matter more than wire color. A blue wire is often used for a common connection, for example, but it may not connect to the matching terminal at the other end.
Systems that usually need another solution
Verify the equipment type before choosing a thermostat if you have any of the following:
- 120- or 240-volt electric baseboard heaters, which are high voltage systems.
- Millivolt heaters, such as wall heaters, floor furnaces, or fireplaces.
- Proprietary systems that use data terminals instead of standard R, W, Y, G, and C terminals.
- Solid fuel systems that don’t use a standard 24-volt thermostat circuit.
Millivolt heaters and proprietary systems require application-specific controls. Standard smart thermostats cannot control high voltage systems or those applications, and the wrong control can damage equipment or fail to operate.
Stranded thermostat wires also deserve care. Don’t force a loose stranded conductor into a small terminal. Follow the thermostat maker’s instructions, or have a local professional make an approved connection and verify unusual wiring.
Inspect thermostat wiring without taking unsafe shortcuts
The thermostat base gives useful clues, but it doesn’t tell the whole story. The furnace, air handler, heat pump, or zone panel is where the wiring must ultimately match.
Shut off power at the equipment first
Turn off the breaker that powers the furnace or air handler before removing the thermostat face. The thermostat’s display may go dark while the equipment still has live power, so don’t treat the screen as proof that the system is safe.
If you know how to use an electrical meter, verify that high-voltage power is off at the equipment. A non-contact tester isn’t a reliable way to prove a 24-volt control circuit is dead. Also, never bypass a furnace door switch to keep the control board energized.
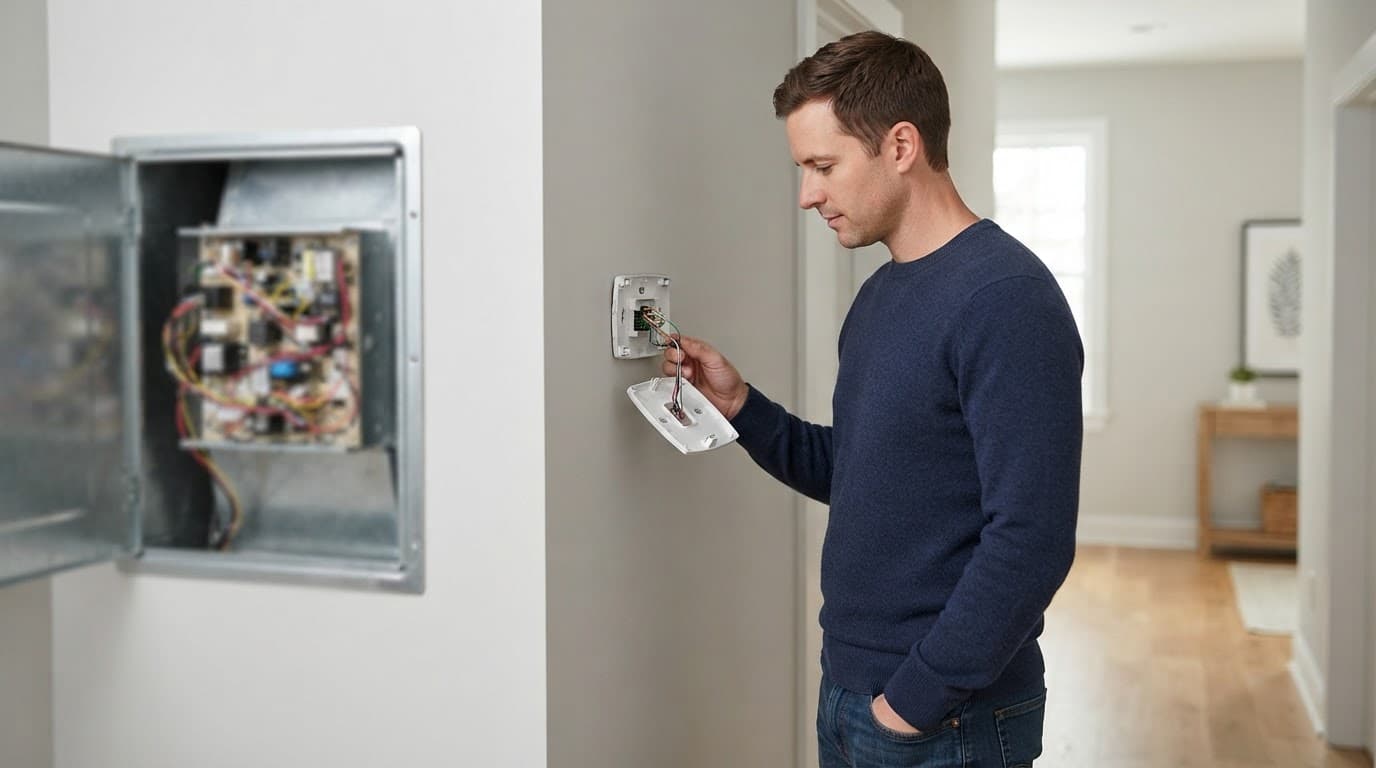
Record terminal letters, not wire colors
Take a clear photo of the thermostat wires before removing a single one. Photograph any wire connectors or existing splice before disturbing anything. Note which terminals are in use, including R, Rc, Rh, C, W, W2, Y, Y2, G, O/B, Aux, and E.
Compare the wall-side thermostat wires with their equipment-side connections. A wall photo can’t prove that a C wire reaches the correct terminal at the equipment. Older thermostats may use jumper wires between R and Rc, so don’t copy that arrangement automatically onto a new thermostat. If you can’t verify the connection safely at the equipment control board, contact a local professional.
Compare brands and models before choosing a thermostat
Google Nest thermostats and ecobee models give you more choices for simple systems. However, a model that works in one home may need an accessory or professional setup in another.
Google Nest thermostats have different compatibility limits
Google separates the current Nest Thermostat, Nest Thermostat E, earlier Nest Learning Thermostat models, and the fourth-generation model in its compatibility guidance.
Compared with the Nest Learning Thermostat, the standard Nest Thermostat needs a C wire or Nest Power Connector for several arrangements, including single stage heating and cool-only setups.
The fourth-generation Nest Learning Thermostat supports a wider range of staged and dual fuel systems. Still, use Google’s compatibility checker for model-specific guidance, especially for heat pump systems. Verify the exact Nest Learning Thermostat model, terminals, and whether it needs a Nest Power Connector before buying.
Ecobee thermostat compatibility follows a different common-wire path
An Ecobee thermostat works with most 24-volt residential systems, including gas, oil, and electric equipment. Many models also support heat pumps, staged setups, and two-source configurations. Start with ecobee’s thermostat compatibility checker before buying a model.
Many ecobee products can use a Power Extender Kit at the furnace control board when the wall cable lacks a common-wire connection. Ecobee’s HVAC compatibility guidance confirms that its thermostats are designed for standard 24-volt controls, not millivolt or high voltage systems. If the model, wiring, or equipment remains unclear, ask a local professional to compare them before installation.
When a C wire is required
The C wire, or common wire, provides a continuous return path to the 24-volt transformer. Wi-Fi thermostats use more power than old mechanical models, so many need that steady connection to charge and maintain their internal electronics.
A thermostat can sometimes operate without a common connection by borrowing power during heating or cooling calls. That method may work for a while, yet it can cause trouble with certain equipment.
A thermostat that repeatedly reboots, drops its Wi-Fi connection, or runs the fan unexpectedly may lack stable power, even if it appears to work at first.
Check for an unused conductor first
Many thermostat cables contain an extra unused wire tucked behind the wall or coiled at the furnace control board. If that conductor appears at both ends of the thermostat wires, a technician can connect it to the C terminal and establish a true C wire.
Never connect an unused wall wire to C at the thermostat without checking its landing point at the equipment. It must be the same conductor, and it must land on the correct C terminal.
Use a manufacturer-approved adapter when needed
If no spare wire exists, ask a local professional to run a new thermostat cable, the most direct long-term fix. A Nest Power Connector or ecobee Power Extender Kit may provide a C wire on compatible 24-volt transformer systems.
Google states that its Nest Power Connector works only with 24 VAC systems. It’s intended for compatible 24-volt equipment, not high voltage systems or millivolt heaters.
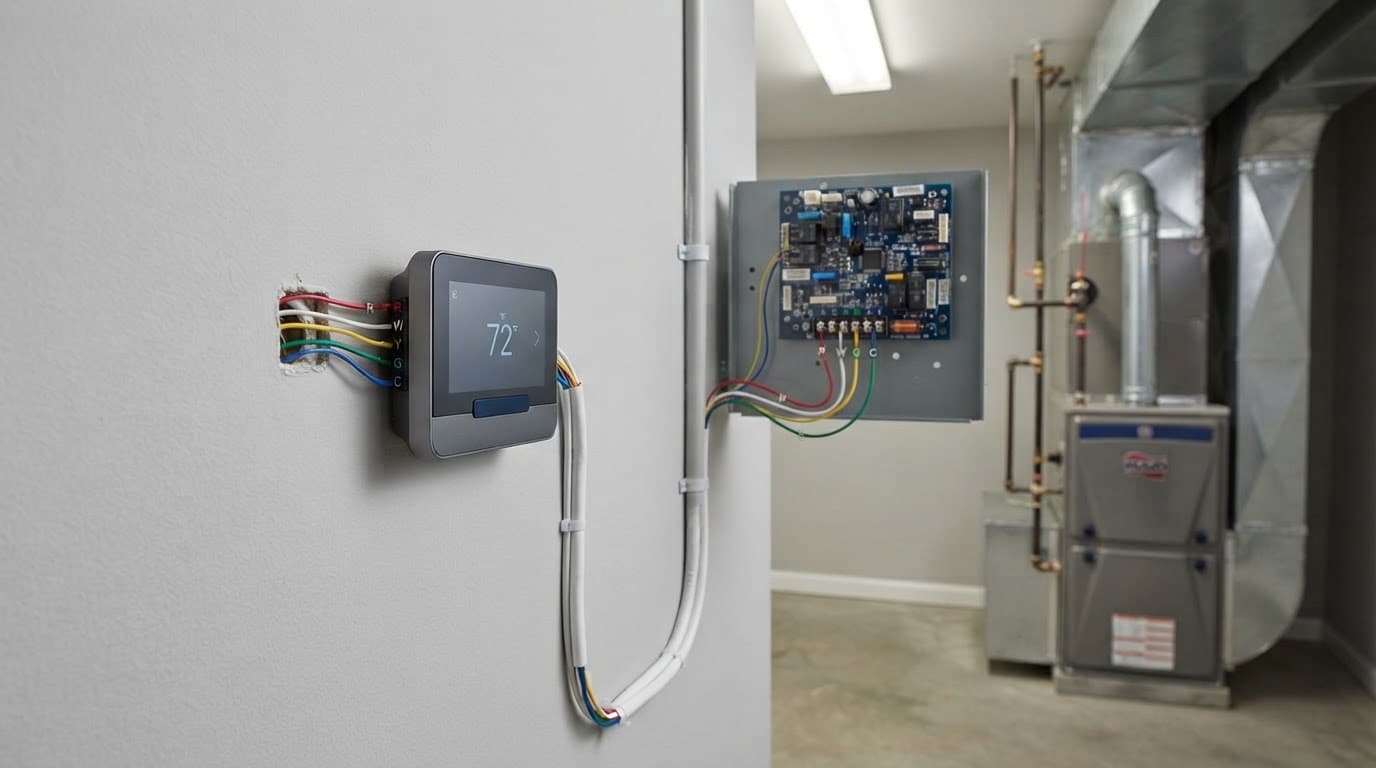
Follow the thermostat cable back to the control board
The furnace control board is the best place to verify what your wall thermostat controls. With power off, remove only the access panel needed to view its labeled terminals.
Match every terminal at both ends
A typical conventional system may use R for power, C for common, W for heat, Y for cooling, and G for the indoor blower. Heat pumps often add O/B for the reversing valve and may use Aux or E for backup heat.
Compare the thermostat wires at the wall and board, confirming the C wire reaches common at both ends. If a wire disappears into a splice, zone panel, or interface module, stop there; wire connectors may hide the actual path. A hidden splice can change the wiring plan, so don’t rewire it by trial and error.
Watch for complex system controls
Two transformers can signal complex transformer systems beyond a basic wiring match. Multiple thermostats, zoning dampers, and separate boiler controls add complexity, while proprietary systems may use equipment-interface data. A humidifier or dehumidifier may need controls beyond a basic thermostat; wrong accessory wiring can damage a transformer or board.
We recommend a local professional for systems with a zone panel, unusual labels, multiple indoor units, or accessory controls. These installations need a full view of the heating and cooling controls, not a guess based on the thermostat wall plate.
Heat pumps and dual-fuel systems need careful setup
Heat pump systems are common in West Alabama because one system can provide both cooling and heat. Their wiring differs from a conventional furnace and AC combination.
Dual fuel uses two heat sources
Dual fuel systems combine a heat pump with a gas furnace. The thermostat must know when to switch from compressor operation to furnace heat. Incorrect settings can cause poor comfort, unnecessary furnace operation, or a system that won’t heat correctly.
Some Nest Learning Thermostat configurations may require a C wire for reliable operation. The Nest Power Connector may be a manufacturer-approved alternative on compatible systems, depending on the wiring and model.
For a system with a heat pump and gas furnace, our furnace and heat pump services in Northport can confirm the control setup before a thermostat replacement.
Accessories can complicate a simple upgrade
Whole-home humidifiers, dehumidifiers, ventilation systems, emergency heat, and zoning systems may use terminals that a basic thermostat doesn’t support. A thermostat’s product page may promise broad compatibility while leaving out accessory control limits.
Bring the model numbers and clear photos of the thermostat wires to a local professional. They can confirm O/B, Aux/E, lockout, and staging settings before recommending a replacement. This information is far more useful than guessing based on the home’s age.
Avoid installation mistakes that mimic equipment failure
A thermostat replacement can expose an existing HVAC issue. It can also create a new one if a wire slips loose, a setting is wrong, or the thermostat is incompatible.
Don’t make random connections to force the system on
If cooling won’t start after installation, turn off power and inspect your photos and terminal connections. Don’t connect R to Y, W, or G at random. This can short the transformer, blow a fuse, or damage the control board.
When an air conditioner won’t cool during hot weather, a wiring mistake can feel urgent. Repeated resets or improvised connections can turn a thermostat issue into a larger repair. If the unit blows warm air, trips a breaker, or makes an electrical buzzing sound, turn it off and contact a local professional for emergency AC repair.
Treat a buzzing gas valve as a same-day concern
A gas valve that vibrates or buzzes after a thermostat installation needs prompt diagnosis. Loose wiring, transformer trouble, a control-board issue, or the valve itself may cause the sound.
Turn off the heating system and call for service rather than cycling it repeatedly. Leave the home and contact 911 or the gas utility from outside if you smell gas, hear hissing, see smoke, or a carbon monoxide alarm sounds.
Get a measured diagnosis for unusual wiring
Smart thermostats should make comfort easier, not create uncertainty. At Northport HVAC, our licensed, insured, NATE-certified technicians check transformer output, terminal connections, thermostat calls, safety controls, and equipment response across heating and cooling systems before recommending a fix.
We work on Trane, Carrier, Rheem, Lennox, Goodman, and Mitsubishi equipment, as well as proprietary systems, across Northport, Tuscaloosa, Coker, Samantha, and nearby communities. Clear diagnostics matter whether you need thermostat installation, routine maintenance, AC repair in Northport, AL, or a no-heat call.
A local professional can verify whether your equipment has a C wire and explain whether a new wire, Power Extender Kit, Nest Power Connector, or a different thermostat model is the right fit. If the wiring, adapter, or thermostat model requires more than a basic replacement, professional installation can help prevent setup errors.
Frequently Asked Questions
What voltage does a smart thermostat need?
Most smart thermostats work with standard 24-volt AC HVAC controls. They are not designed for 120- or 240-volt baseboard heaters, millivolt heaters, or many proprietary systems.
Can I determine compatibility from wire colors?
No, wire colors are not a reliable way to confirm compatibility. Check the terminal letters and verify that each conductor connects correctly at both the thermostat and the equipment control board.
Do I need a C wire for a smart thermostat?
Many Wi-Fi thermostats need a C wire to maintain stable power, although some compatible models can use an approved adapter or power extender. Check the exact thermostat model and confirm that the common connection reaches the correct C terminal at the equipment.
Can I use a smart thermostat with a heat pump or dual-fuel system?
Many smart thermostats support heat pumps, staged systems, and dual-fuel equipment. Use the manufacturer’s compatibility checker and verify O/B, Aux, emergency heat, staging, and changeover settings before installation.
When should I ask a professional to check compatibility?
Contact a local professional when you have a zone panel, multiple transformers, unusual terminal labels, accessories, proprietary controls, or wiring that disappears into a splice. Professional verification is also wise when you cannot safely confirm the voltage, C wire, or equipment-side connections.
Choose Compatibility Before Convenience
A smart thermostat is only as reliable as the system behind it. Confirm 24-volt compatibility, compare terminal labels at both ends, and provide stable power before installation.
The right common-wire solution protects both comfort and HVAC controls. When wiring, voltage, or system stages are unclear, a measured inspection is safer than trial-and-error connections.
Do HVAC Surge Protectors Prevent Alabama Storm Damage?
A summer storm can leave your outdoor condenser looking fine while a power surge damages a circuit board inside your air conditioner. HVAC surge protectors reduce that electrical risk, but they can’t promise complete protection from every kind of storm damage.
In Northport and Tuscaloosa, a lightning strike, utility interruptions, and power restoration after an outage can all send damaging voltage through a home’s electrical system. We recommend treating surge protection, earth ground, and protection for variable-speed equipment as parts of a larger plan for protecting modern heating and cooling systems.
Key Takeaways
- HVAC surge protectors can reduce the risk of electrical damage to sensitive components such as inverter control boards, variable-speed motors, thermostats, and communicating equipment.
- Surge protection cannot prevent physical storm damage from lightning, wind, hail, flooding, falling limbs, or a direct strike that overwhelms the electrical system.
- Layered protection may include a Type 1 SPD at the service entrance, a Type 2 SPD at the main panel or HVAC disconnect, and verified bonding and earth ground.
- Surge protection devices must match the HVAC system’s voltage, phase, and electrical configuration, and panel or disconnect installation should be completed by a qualified professional.
- After severe weather, check the SPD status indicator and HVAC equipment for damage, and arrange service promptly if the system will not cool, repeatedly trips breakers, or shows burning smells or visible damage.
What Surge Protection Can and Cannot Prevent
A surge protection device detects brief voltage transients and diverts excess energy along the grounding path toward earth ground. That response can help protect sensitive parts in an outdoor condenser and air handler. These include an inverter control board, other control boards, variable-speed blower motors, thermostats, and communicating equipment.
A Type 2 SPD can protect a branch circuit near the main panel. A second Type 2 SPD can protect equipment near the disconnect box. A Type 1 SPD protects at the service entrance, before power reaches downstream circuits.
Modern variable-speed systems rely on more electronics than older fixed-speed systems. A damaged inverter control board in an outdoor condenser, or control boards in an air handler, can create a repair bill of roughly $800 to $2,500. The replacement cost may involve an ECM motor or IGBT power modules, depending on the equipment and replacement-part availability.
A surge is different from physical storm damage
Surge protection won’t stop a falling limb, floodwater, hail, wind damage, or a direct lightning strike that overwhelms the home’s electrical system. It also can’t repair weak wiring, poor grounding, or a failing compressor.
A nearby strike can still create a damaging power surge through utility lines or the ground. Poor grounding can limit protection when the system lacks a reliable path to earth ground. During active weather, follow updates from the National Weather Service Birmingham forecast office and avoid opening an electrical panel or touching outdoor equipment.
Surge protection lowers the odds of electrical damage. It doesn’t make an air conditioner stormproof.
Use Layered Protection for HVAC Equipment
A whole-home surge protector at the main panel is a strong first layer. However, a surge protection device may not catch every voltage transient before energy reaches a long HVAC circuit, an outdoor condenser, or an air handler.
Equipment-level protection adds a Type 2 SPD near sensitive equipment with a dependable grounding path to earth ground. Modern variable-speed systems use sensitive control boards, so layered protection can reduce exposure along the circuit.
For better coverage, we often suggest discussing a layered plan with an electrician and HVAC professional. The right layout depends on the home’s service equipment, grounding, system voltage, and the manufacturer’s installation instructions. Service equipment should also provide a verified connection to earth ground.
Match the surge device to its location
| Device type | Typical location | Main purpose |
|---|---|---|
| Type 1 SPD | Service entrance or main electrical equipment | Reduces surges entering from utility power |
| Type 2 SPD | Main panel or dedicated HVAC circuit | Protects branch circuits and connected equipment |
| Type 3 SPD | Standard outlet near electronics | Adds point-of-use protection for plug-in devices |
A Type 1 SPD at the service entrance helps divert incoming energy before it spreads through branch wiring. A Type 3 surge protector strip isn’t suitable for a hardwired 240-volt air conditioner.
A dedicated HVAC circuit can use a Type 2 SPD at its disconnect box. The outdoor disconnect box may also need another Type 2 SPD to protect the outdoor condenser.
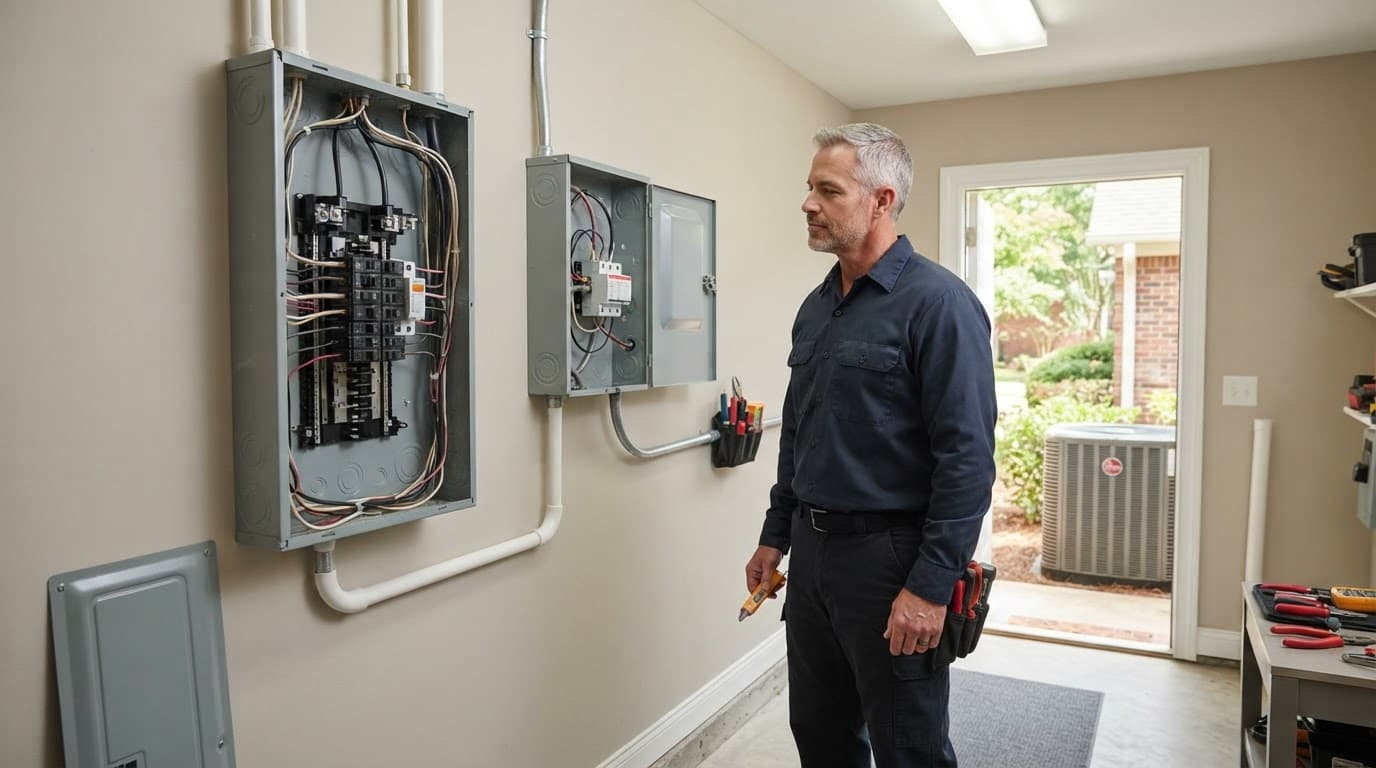
A whole-home protector is a first layer
Whole-home protection helps shield refrigerators, televisions, appliances, and HVAC circuits at once. Yet the outdoor condenser and air handler contain expensive electronics, so a second layer near the equipment can reduce exposure further.
Depending on the layout, a Type 2 SPD at the air handler’s disconnect box can add equipment-level protection.
We recommend asking for a review of the electrical path, not buying a device based on price alone. Selection should account for discharge current, equipment location, the main panel, equipment disconnect box, and indoor equipment connection. Confirm bonding and a reliable connection to earth ground before recommending a Type 2 SPD where needed. Final inspection should confirm that the grounding path remains connected to earth ground.
Choose an HVAC-Rated Device and Qualified Installer
A surge protection device should match the system’s voltage, phase, and electrical configuration. Your main panel and HVAC model both matter. This is especially true for variable-speed Trane, Carrier, Rheem, Lennox, Goodman, and Mitsubishi systems. An air conditioner with an inverter control board needs a Type 2 SPD matched to its control configuration.
Read the ratings before approving installation
Look for these details on the product label or specification sheet:
- A recognized listing, such as UL 1449, that confirms the intended SPD type, such as a Type 2 SPD for a branch circuit.
- A voltage rating that matches the HVAC circuit.
- A suitable nominal discharge current and maximum surge-current rating for the circuit.
- A voltage protection rating, often called VPR, to compare similar devices by let-through voltage and clamping voltage.
- A visible status indicator or alarm that reports when protection has failed, helping identify risk to control boards.
Service-entry and branch-circuit protection serve different purposes. A Type 1 SPD is generally installed at service equipment, while a Type 2 SPD protects equipment downstream from the main panel. Confirm the connection to earth ground and the bonding path before approving the device.
UL’s surge protection testing guidance explains why product testing, certification, and proper installation matter. Poor connections or a weak earth ground can limit protection against voltage transients and increase replacement cost. A plug-in surge protector strip isn’t a substitute for a hardwired device at the HVAC circuit, either.
Leave panel and disconnect work to professionals
Electrical panel work and condenser disconnect wiring carry shock and fire risks. A qualified electrician should install or modify the device and evaluate the main panel and disconnect box together. A Type 1 SPD may protect service equipment, but it doesn’t replace correct branch-circuit protection.
At the outdoor condenser, the technician should verify the disconnect box, conductor size, and bond to earth ground. The outdoor condenser and the air handler should be checked separately, each with its own disconnect box and grounding path. A Type 2 SPD may suit the outdoor condenser when its ratings match the circuit. A Type 2 SPD may also suit the air handler after the installer confirms its voltage and phase. The disconnect box serving the air handler should remain accessible, and its variable-speed motor or control configuration also matters. Its grounding path should terminate at a verified earth ground.
At Northport HVAC, we can assess electrical symptoms during a service call and coordinate the HVAC side of the work. We can also confirm whether a Type 2 SPD fits the equipment and whether its status indicator remains visible after installation. For Tuscaloosa air conditioning concerns, our Tuscaloosa HVAC services include diagnostics for control boards, motors, capacitors, and other storm-related failures.
Inspect Protection After Severe Weather
Many residential Type 2 SPD units use a metal oxide varistor. These sacrificial devices absorb surge energy over time, so they can lose protective capacity while the air conditioner still appears to run normally. Service equipment may use a Type 1 SPD, while the main panel may have a Type 2 SPD for downstream circuits.
Check the status indicator
After severe weather, inspect the status indicator on the Type 2 SPD serving the outdoor condenser. Check the outdoor condenser’s disconnect box and the air handler’s disconnect box for heat or damage. Then inspect the air handler and its control wiring, including the equipment disconnect box. Verify the earth ground connection, then include earth ground testing in the post-event evaluation.
Review the indicator light during seasonal maintenance and after a major electrical event. Follow the device manual, because light colors and alert methods vary by model.
A status light reports the protector’s condition, not the condition of the air conditioner.
If the status indicator shows a fault, lost protection, or no normal indication, arrange replacement promptly. A failed device may no longer handle its rated discharge current. Don’t assume the breaker needs resetting or that the surge protector has fixed itself. A hardwired unit isn’t reset like a surge protector strip, and replacing it promptly may avoid a higher replacement cost later.
Call for service when cooling does not recover
After power returns, use the thermostat normally once. Turn the system off and arrange emergency AC repair if you notice:
- Repeated breaker trips or a blank thermostat.
- Buzzing, burning smells, smoke, or visible damage.
- An outdoor fan that will not start.
- No cooling, weak airflow, or frequent short cycles.
Our local HVAC technicians test the electrical components instead of replacing parts by guesswork. For AC repair in Northport, AL, heating and AC repair in Northport can help identify whether a surge damaged the air handler, variable-speed controls, control boards, contactor, capacitor, motor, or another component.
Frequently Asked Questions
Do HVAC surge protectors prevent all Alabama storm damage?
No. They can reduce the risk of electrical damage from voltage transients, but they cannot prevent damage from flooding, hail, wind, falling limbs, or every direct lightning strike.
What type of surge protector does an air conditioner need?
A hardwired Type 2 SPD is commonly used for a dedicated HVAC circuit or near an equipment disconnect box. The device must match the system’s voltage, phase, and electrical configuration, while a Type 1 SPD serves a different role at the service entrance.
Is a whole-home surge protector enough for HVAC equipment?
A whole-home SPD provides an important first layer, but it may not catch every transient before it reaches a long HVAC circuit. An additional Type 2 SPD near the outdoor condenser or air handler can provide equipment-level protection when properly selected and grounded.
Should I inspect the surge protector after a storm?
Yes. Check the status indicator and look for heat, visible damage, burning smells, repeated breaker trips, or cooling problems, but do not open an electrical panel or touch unsafe equipment. Have a qualified electrician or HVAC professional inspect failed protection, grounding, and storm-related equipment problems.
Protect the Equipment Before the Next Storm
For Alabama homes with modern electronics, layered protection is a practical choice. A Type 1 SPD at the service entrance can work with a Type 2 SPD closer to the equipment.
This approach helps protect an outdoor condenser and air handler, each with its own disconnect box. Properly selected and maintained protection can reduce a preventable source of HVAC damage.
After severe weather, ask an electrician to confirm the earth ground and inspect each disconnect box and the device’s status indicator. This reduces risk, but it can’t prevent every storm-related problem.