Smart Thermostat Compatibility: Check Wiring Before You Buy
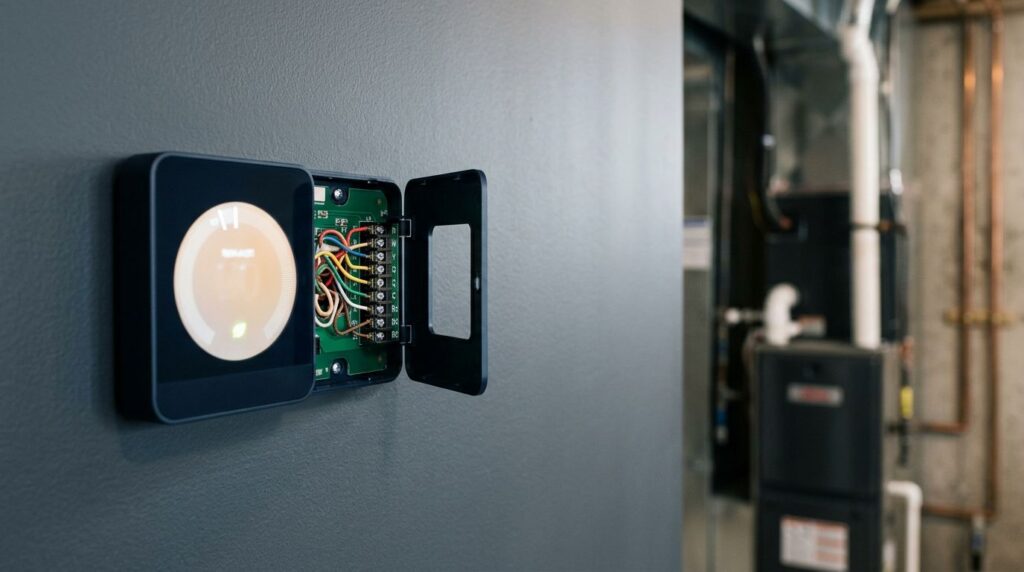
A smart thermostat can make daily comfort easier, but the wrong match can leave you without heat or cooling. Smart thermostat compatibility depends on your HVAC system’s voltage, controls, thermostat wires, terminal labels, and power needs, not wire colors alone.
Most Northport and Tuscaloosa homes with heating and cooling systems use 24-volt controls that work with common smart thermostats. Older heaters, specialty systems, and a C wire need a closer look before you order anything.
Use the manufacturer’s compatibility checker before ordering. If voltage, controls, or wiring are unclear, ask a local professional to verify the match.
Key Takeaways
- Most smart thermostats are designed for standard 24-volt HVAC controls, while high-voltage, millivolt, and proprietary systems usually need another solution.
- Terminal labels and equipment-side connections matter more than wire colors, so compare the thermostat wiring with the furnace, air handler, heat pump, or zone panel.
- Many Wi-Fi thermostats need a C wire for stable power; an unused conductor, a new thermostat cable, or a manufacturer-approved adapter may provide the right solution.
- Heat pumps, dual-fuel systems, staging, zoning, and accessories require model-specific compatibility checks and correct setup.
- Use the manufacturer’s compatibility checker before buying, and ask a local professional to verify unusual wiring or unclear voltage and controls.
Smart thermostat compatibility starts with voltage
Most smart thermostats work with 24-volt AC HVAC controls. That includes many gas furnaces, electric air handlers, central air conditioners, heat pumps, and oil-fired systems. Single stage heating is often straightforward, while two stage cooling may need more terminals and correct setup.
Voltage and terminal labels matter more than wire color. A blue wire is often used for a common connection, for example, but it may not connect to the matching terminal at the other end.
Systems that usually need another solution
Verify the equipment type before choosing a thermostat if you have any of the following:
- 120- or 240-volt electric baseboard heaters, which are high voltage systems.
- Millivolt heaters, such as wall heaters, floor furnaces, or fireplaces.
- Proprietary systems that use data terminals instead of standard R, W, Y, G, and C terminals.
- Solid fuel systems that don’t use a standard 24-volt thermostat circuit.
Millivolt heaters and proprietary systems require application-specific controls. Standard smart thermostats cannot control high voltage systems or those applications, and the wrong control can damage equipment or fail to operate.
Stranded thermostat wires also deserve care. Don’t force a loose stranded conductor into a small terminal. Follow the thermostat maker’s instructions, or have a local professional make an approved connection and verify unusual wiring.
Inspect thermostat wiring without taking unsafe shortcuts
The thermostat base gives useful clues, but it doesn’t tell the whole story. The furnace, air handler, heat pump, or zone panel is where the wiring must ultimately match.
Shut off power at the equipment first
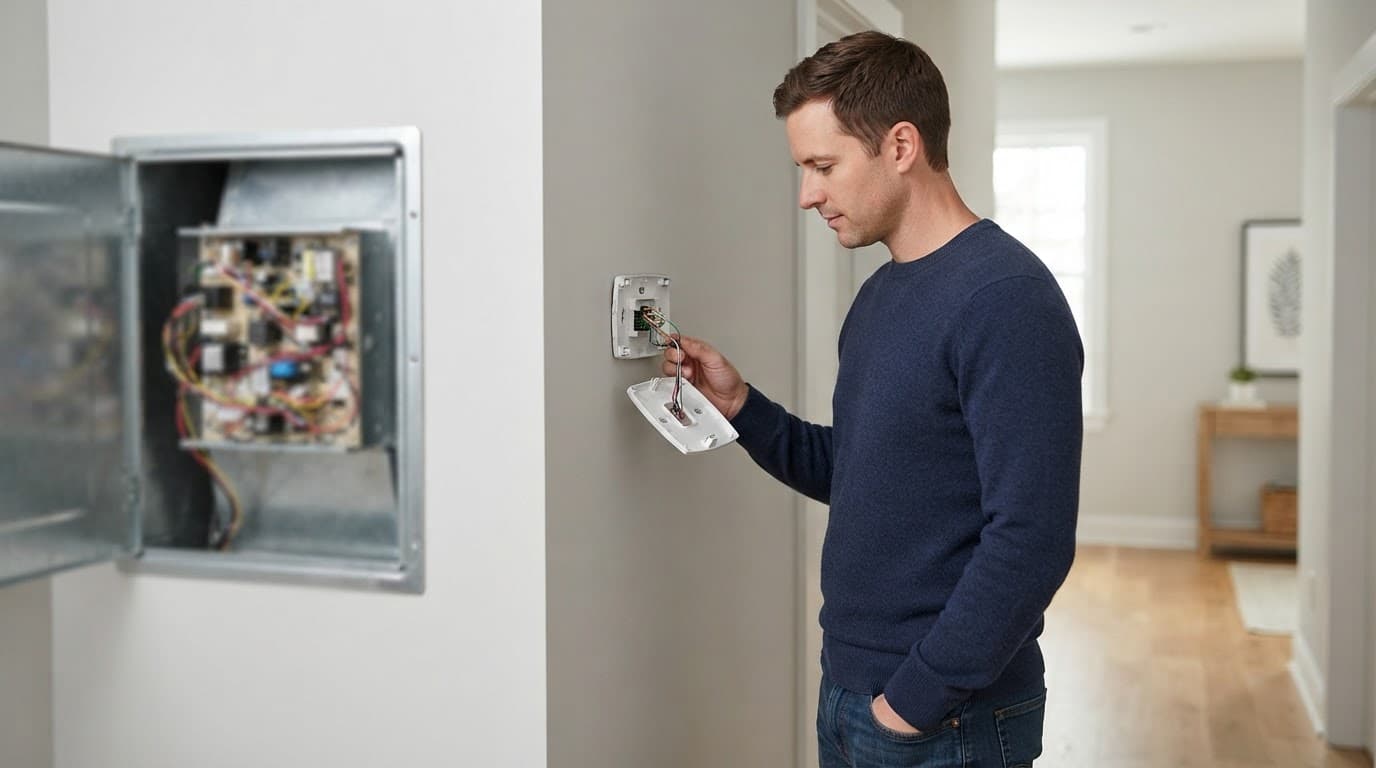
Turn off the breaker that powers the furnace or air handler before removing the thermostat face. The thermostat’s display may go dark while the equipment still has live power, so don’t treat the screen as proof that the system is safe.
If you know how to use an electrical meter, verify that high-voltage power is off at the equipment. A non-contact tester isn’t a reliable way to prove a 24-volt control circuit is dead. Also, never bypass a furnace door switch to keep the control board energized.
Record terminal letters, not wire colors
Take a clear photo of the thermostat wires before removing a single one. Photograph any wire connectors or existing splice before disturbing anything. Note which terminals are in use, including R, Rc, Rh, C, W, W2, Y, Y2, G, O/B, Aux, and E.
Compare the wall-side thermostat wires with their equipment-side connections. A wall photo can’t prove that a C wire reaches the correct terminal at the equipment. Older thermostats may use jumper wires between R and Rc, so don’t copy that arrangement automatically onto a new thermostat. If you can’t verify the connection safely at the equipment control board, contact a local professional.
Compare brands and models before choosing a thermostat
Google Nest thermostats and ecobee models give you more choices for simple systems. However, a model that works in one home may need an accessory or professional setup in another.
Google Nest thermostats have different compatibility limits
Google separates the current Nest Thermostat, Nest Thermostat E, earlier Nest Learning Thermostat models, and the fourth-generation model in its compatibility guidance.
Compared with the Nest Learning Thermostat, the standard Nest Thermostat needs a C wire or Nest Power Connector for several arrangements, including single stage heating and cool-only setups.
The fourth-generation Nest Learning Thermostat supports a wider range of staged and dual fuel systems. Still, use Google’s compatibility checker for model-specific guidance, especially for heat pump systems. Verify the exact Nest Learning Thermostat model, terminals, and whether it needs a Nest Power Connector before buying.
Ecobee thermostat compatibility follows a different common-wire path
An Ecobee thermostat works with most 24-volt residential systems, including gas, oil, and electric equipment. Many models also support heat pumps, staged setups, and two-source configurations. Start with ecobee’s thermostat compatibility checker before buying a model.
Many ecobee products can use a Power Extender Kit at the furnace control board when the wall cable lacks a common-wire connection. Ecobee’s HVAC compatibility guidance confirms that its thermostats are designed for standard 24-volt controls, not millivolt or high voltage systems. If the model, wiring, or equipment remains unclear, ask a local professional to compare them before installation.
When a C wire is required
The C wire, or common wire, provides a continuous return path to the 24-volt transformer. Wi-Fi thermostats use more power than old mechanical models, so many need that steady connection to charge and maintain their internal electronics.
A thermostat can sometimes operate without a common connection by borrowing power during heating or cooling calls. That method may work for a while, yet it can cause trouble with certain equipment.
A thermostat that repeatedly reboots, drops its Wi-Fi connection, or runs the fan unexpectedly may lack stable power, even if it appears to work at first.
Check for an unused conductor first
Many thermostat cables contain an extra unused wire tucked behind the wall or coiled at the furnace control board. If that conductor appears at both ends of the thermostat wires, a technician can connect it to the C terminal and establish a true C wire.
Never connect an unused wall wire to C at the thermostat without checking its landing point at the equipment. It must be the same conductor, and it must land on the correct C terminal.
Use a manufacturer-approved adapter when needed
If no spare wire exists, ask a local professional to run a new thermostat cable, the most direct long-term fix. A Nest Power Connector or ecobee Power Extender Kit may provide a C wire on compatible 24-volt transformer systems.
Google states that its Nest Power Connector works only with 24 VAC systems. It’s intended for compatible 24-volt equipment, not high voltage systems or millivolt heaters.
Follow the thermostat cable back to the control board
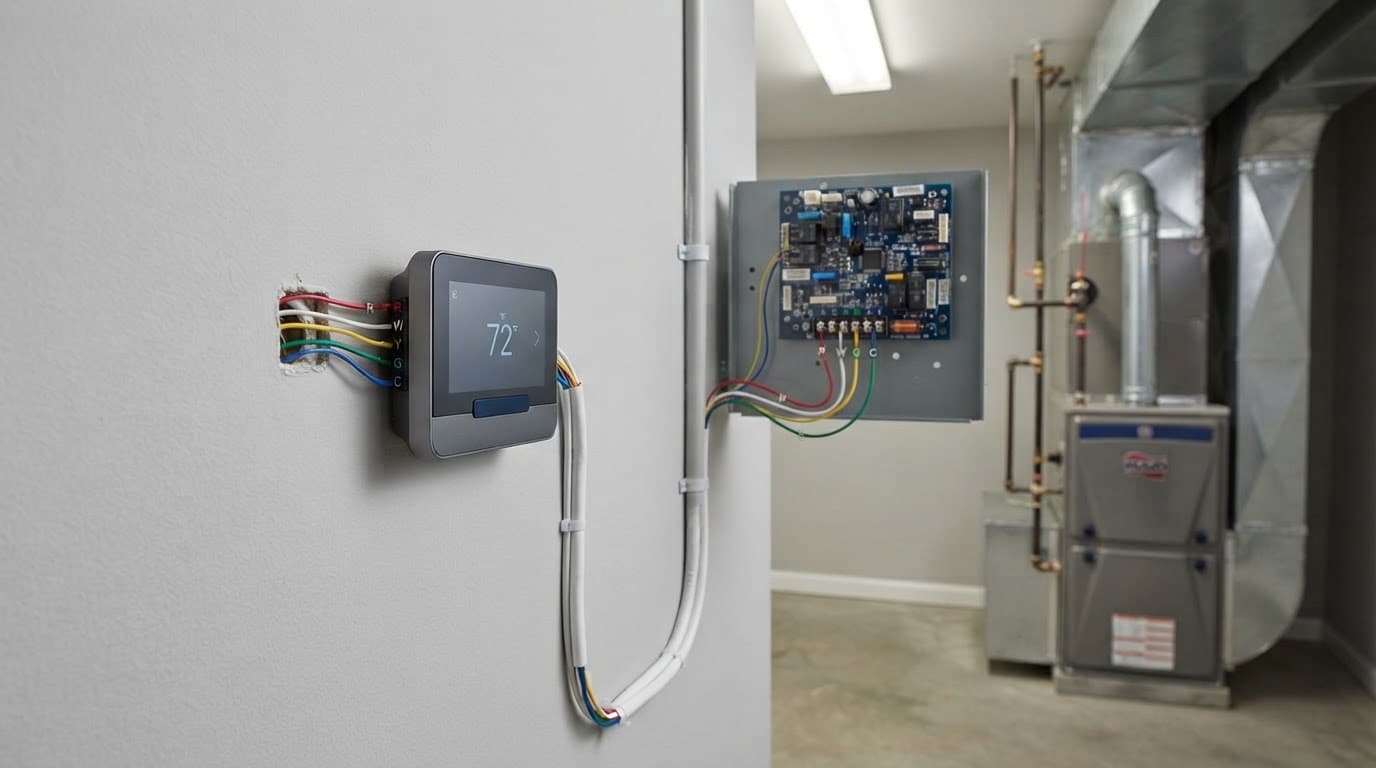
The furnace control board is the best place to verify what your wall thermostat controls. With power off, remove only the access panel needed to view its labeled terminals.
Match every terminal at both ends
A typical conventional system may use R for power, C for common, W for heat, Y for cooling, and G for the indoor blower. Heat pumps often add O/B for the reversing valve and may use Aux or E for backup heat.
Compare the thermostat wires at the wall and board, confirming the C wire reaches common at both ends. If a wire disappears into a splice, zone panel, or interface module, stop there; wire connectors may hide the actual path. A hidden splice can change the wiring plan, so don’t rewire it by trial and error.
Watch for complex system controls
Two transformers can signal complex transformer systems beyond a basic wiring match. Multiple thermostats, zoning dampers, and separate boiler controls add complexity, while proprietary systems may use equipment-interface data. A humidifier or dehumidifier may need controls beyond a basic thermostat; wrong accessory wiring can damage a transformer or board.
We recommend a local professional for systems with a zone panel, unusual labels, multiple indoor units, or accessory controls. These installations need a full view of the heating and cooling controls, not a guess based on the thermostat wall plate.
Heat pumps and dual-fuel systems need careful setup
Heat pump systems are common in West Alabama because one system can provide both cooling and heat. Their wiring differs from a conventional furnace and AC combination.
Dual fuel uses two heat sources
Dual fuel systems combine a heat pump with a gas furnace. The thermostat must know when to switch from compressor operation to furnace heat. Incorrect settings can cause poor comfort, unnecessary furnace operation, or a system that won’t heat correctly.
Some Nest Learning Thermostat configurations may require a C wire for reliable operation. The Nest Power Connector may be a manufacturer-approved alternative on compatible systems, depending on the wiring and model.
For a system with a heat pump and gas furnace, our furnace and heat pump services in Northport can confirm the control setup before a thermostat replacement.
Accessories can complicate a simple upgrade
Whole-home humidifiers, dehumidifiers, ventilation systems, emergency heat, and zoning systems may use terminals that a basic thermostat doesn’t support. A thermostat’s product page may promise broad compatibility while leaving out accessory control limits.
Bring the model numbers and clear photos of the thermostat wires to a local professional. They can confirm O/B, Aux/E, lockout, and staging settings before recommending a replacement. This information is far more useful than guessing based on the home’s age.
Avoid installation mistakes that mimic equipment failure
A thermostat replacement can expose an existing HVAC issue. It can also create a new one if a wire slips loose, a setting is wrong, or the thermostat is incompatible.
Don’t make random connections to force the system on
If cooling won’t start after installation, turn off power and inspect your photos and terminal connections. Don’t connect R to Y, W, or G at random. This can short the transformer, blow a fuse, or damage the control board.
When an air conditioner won’t cool during hot weather, a wiring mistake can feel urgent. Repeated resets or improvised connections can turn a thermostat issue into a larger repair. If the unit blows warm air, trips a breaker, or makes an electrical buzzing sound, turn it off and contact a local professional for emergency AC repair.
Treat a buzzing gas valve as a same-day concern
A gas valve that vibrates or buzzes after a thermostat installation needs prompt diagnosis. Loose wiring, transformer trouble, a control-board issue, or the valve itself may cause the sound.
Turn off the heating system and call for service rather than cycling it repeatedly. Leave the home and contact 911 or the gas utility from outside if you smell gas, hear hissing, see smoke, or a carbon monoxide alarm sounds.
Get a measured diagnosis for unusual wiring
Smart thermostats should make comfort easier, not create uncertainty. At Northport HVAC, our licensed, insured, NATE-certified technicians check transformer output, terminal connections, thermostat calls, safety controls, and equipment response across heating and cooling systems before recommending a fix.
We work on Trane, Carrier, Rheem, Lennox, Goodman, and Mitsubishi equipment, as well as proprietary systems, across Northport, Tuscaloosa, Coker, Samantha, and nearby communities. Clear diagnostics matter whether you need thermostat installation, routine maintenance, AC repair in Northport, AL, or a no-heat call.
A local professional can verify whether your equipment has a C wire and explain whether a new wire, Power Extender Kit, Nest Power Connector, or a different thermostat model is the right fit. If the wiring, adapter, or thermostat model requires more than a basic replacement, professional installation can help prevent setup errors.
Frequently Asked Questions
What voltage does a smart thermostat need?
Most smart thermostats work with standard 24-volt AC HVAC controls. They are not designed for 120- or 240-volt baseboard heaters, millivolt heaters, or many proprietary systems.
Can I determine compatibility from wire colors?
No, wire colors are not a reliable way to confirm compatibility. Check the terminal letters and verify that each conductor connects correctly at both the thermostat and the equipment control board.
Do I need a C wire for a smart thermostat?
Many Wi-Fi thermostats need a C wire to maintain stable power, although some compatible models can use an approved adapter or power extender. Check the exact thermostat model and confirm that the common connection reaches the correct C terminal at the equipment.
Can I use a smart thermostat with a heat pump or dual-fuel system?
Many smart thermostats support heat pumps, staged systems, and dual-fuel equipment. Use the manufacturer’s compatibility checker and verify O/B, Aux, emergency heat, staging, and changeover settings before installation.
When should I ask a professional to check compatibility?
Contact a local professional when you have a zone panel, multiple transformers, unusual terminal labels, accessories, proprietary controls, or wiring that disappears into a splice. Professional verification is also wise when you cannot safely confirm the voltage, C wire, or equipment-side connections.
Choose Compatibility Before Convenience
A smart thermostat is only as reliable as the system behind it. Confirm 24-volt compatibility, compare terminal labels at both ends, and provide stable power before installation.
The right common-wire solution protects both comfort and HVAC controls. When wiring, voltage, or system stages are unclear, a measured inspection is safer than trial-and-error connections.